Tuesday 30 December 2014

How to Unroot Rooted android phone

Rooting has many more advantages than an unrooted Android device. You can use custom ROM’s, kernels, themes and you can customize your device more easily. But it void's your phones manufactures warranty and if you rooted your Android device before the warranty period over then it is an act of violation of warranty terms. 

So, if you have a rooted Android phone and you want to unroot it and want to get warranty back or for any other reason you can do so by using some techniques given in this post.

Before unrooting make sure you have backup your data because while unrooting, all the data will be wiped out. So make sure to backup all your important data either on your SD card or your PC and charge your phone.

SuperSU app

Using this common app most of the android devices can be unrooted. This will work on all devices those are rooted without installing custom recovery.
 

*. First of all download and install SuperSU app from here.

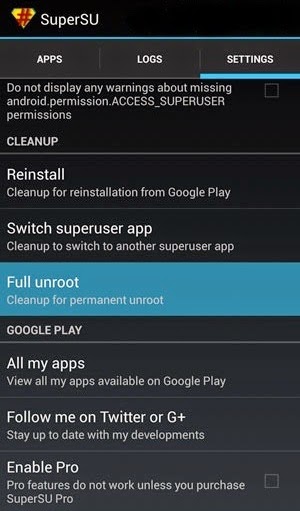
*. Open SuperSU app and go to Settings then tap on Full unroot.


super user unroot phone

*. After successful unroot superuser will automatically close.

*. Restart your device and uninstall SuperSU and your device will be unrooted successfully.
ES File Explorer

ES File Explorer is an android app that will unroot your android device. Following steps will help you unrooting your android devices:

*. Download and install ES File Explorer app on your device from here. Don’t move it to SD card.
 

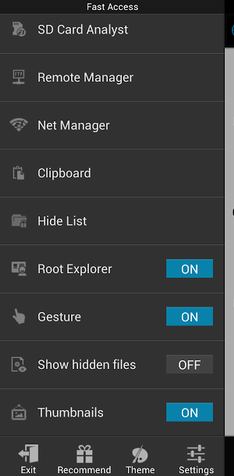
*. After opening the app tap on the menu button. Now tap on Tools and turn on Root Explorer.

es file root explorer

*. Superuser will ask for root privileges to the app, so allow it.
    

*. Now go back to the main screen of the app and select '/' in the top corner of the screen.
 

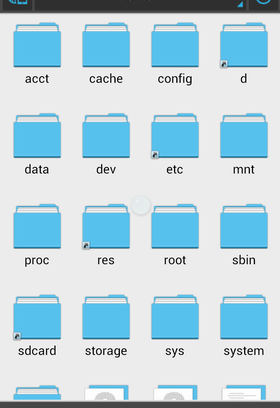
*. Now go to system folder and then bin. Find the busybox and su file and delete them. It no such files then skin this step.
    

system es root folder

*. Go back to system folder then open xbin folder and delete the busybox and su file there if any.
    

*. Now go back to the system folder again and open app folder and then delete the supeuser.apk file located in the folder.

*. Now restart your device and you are done.

That's it! Did you like this post? If yes then show your response. Enjoy rooting and unrooting android.

Thursday 25 December 2014

Retrieve Deleted Facebook Messages

Facebook users are always in a hurry to clear their chat messages or we can say private chat messages from their account. But there are some important messages that needs to be retrieve or recover after accidental deletion. But most of the users are not able to recover these messages or unaware of the fact that the messages can be retrieved. Here is a guide for you which help you recover your deleted messages, photos as well as videos. We will see how this facebook feature worked for us.

retrieve deleted facebook messages

Retrieve Deleted Facebook Messages, Photos and Videos

Following simple steps will let you recover your deleted messages, photos and videos from facebook.

*. Login to your facebook account and go to settings or directly click on the link.

*. Now click on Download a copy of your facebook account.

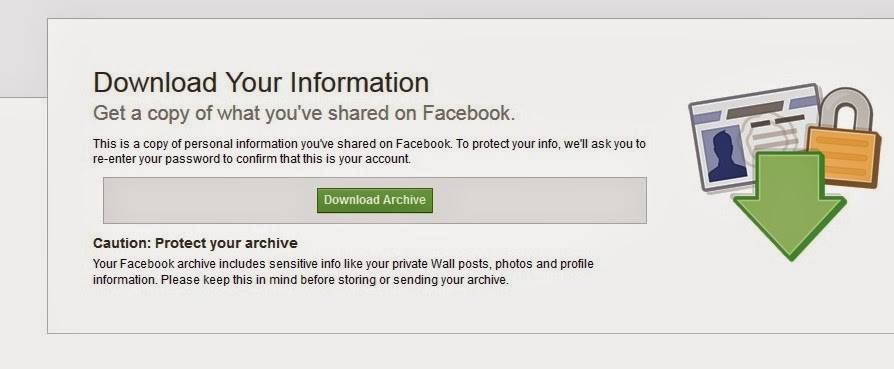
*. Now click on the Download Archive button and you will prompted to enter your facebook account password.

facebook archive download

*. Just enter the password and your download will begin.

*. Now just extract the downloaded zip file and click on the index.html file and you can see all your facebook information.

It's very simple, you can now able to access your deleted messages, photos and all your facebook data is available to you.

Sunday 21 December 2014

UnHack your Android phone with the new app

Do you know who is watching your activities you are doing on your Android smartphone? 

I think anybody who is using Android these days ignore this but the fact is that many of us are unaware of certain processes on our Android. Many of the times you install some apps that can harm your Android and it can access your text messages, your contacts, WhatsApp chats, personal photos and many more that you don’t even thought of. 

So, for solving your problem and providing you extra protection here is an app that will protect you from all this and you can control the behaviour of the apps, which named as UnHack.


UnHack start screen
What is UnHack?

UnHack is an app like any other Android app which will let you see the behaviour of all the apps that are installed on your phone.

According to its developer “UnHack answers a very basic question of giving you complete control of your phone. It does so simply by reversing the permission base that the applications take on your cell phone.In simpler words, it can show you which apps are accessing your SMS, call logs, camera, pictures among others. All this control with just 2 clicks, is what we guarantee you.”

It is very easy to use app you can download it from the play store link here.
Just install the app and open it you will be asked to Analyze your newly installed apps.

What UnHack Can do for you? 

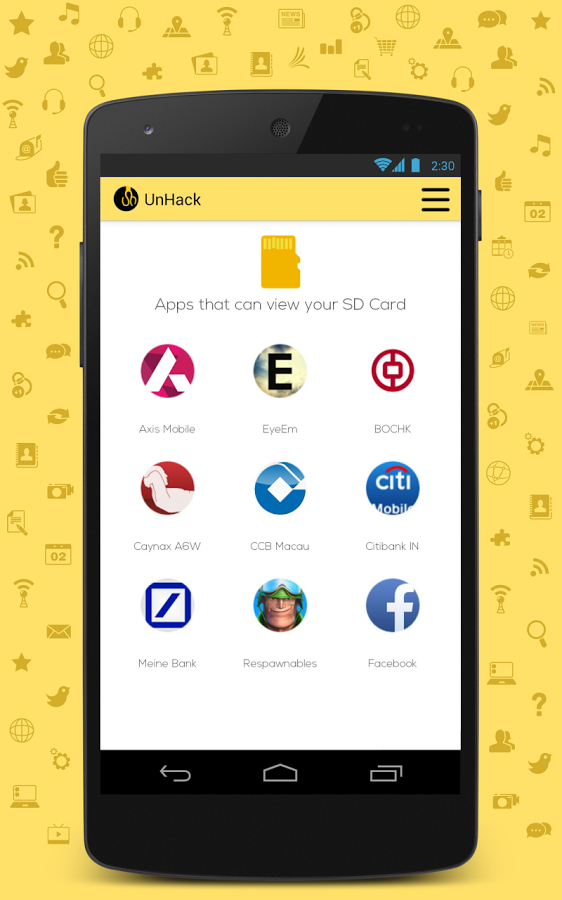
You will see a window like that will say “apps that can view your” SMS, Contact, SD Card, Camera, Internet, Location, Call log etc. Choose any of the icon such as SD Card and you will see the list of apps that is viewing your phones SD Card. For ex. You choose SD Card then it will show you which apps are viewing your SD Card.


apps viewing your SD Card

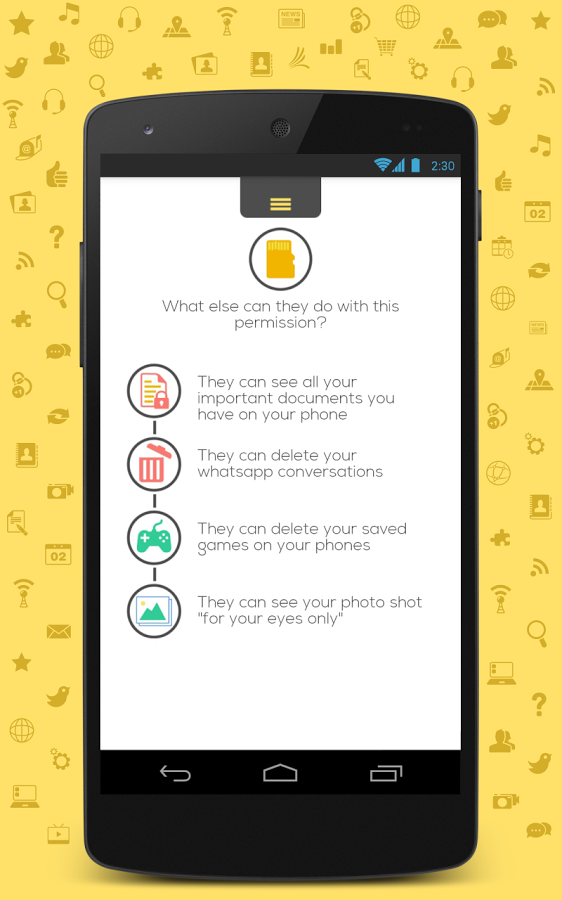
You can also see the various things the installed apps can do with this permission, such as with SD Card access permission

*. They can see all your important documents you have on your phone.
 
*. They can delete your WhatsApp conversation.
 
*. They can delete your saved games.
 
*. They can see your private photos that you don’t want to see by others.


app can see your

You also have an option in the UnHack app to control the permission and you can block certain permission that you don’t want to provide to certain app.

With the help of UnHack all this problems can be overcome. So don’t be worry, now its time for UnHacking your Android phone just install UnHack and monitor the behaviour of  your installed apps.

Tuesday 21 October 2014

How to Root Android Phone Without PC

Rooting any Android phone is very time consuming and complicated process for a normal user. But now you will able to know the easiest process to Root any Android device without using the computer.

The app named Framaroot is very useful for rooting almost any Android device with ease. Framaroot was developed by alephzain from the XDA forums. Just one click and this app will install Superuser and Su binary on your phone. This is compatible with Android version 2 to 4.

framaroot for android

Framaroot uses six major and safe exploits to root your android phone which are Gandalf, Boromir, Sam, Frodo, Aragorn and Gimli.

Why to Root Android Phone?

Most of the people wonder why to Root their Android devices. But there are numerous benefits of rooting an Android phone. Rooting an Android phone helps you unlocks many restrictions and unleash the full performance of a phone. Most manufacturers take a lot of time to release firmware updates on their android devices. But you can use your rooted phone to enjoy custom ROM's with the latest version of android and many exciting features much before its is officially available on your phone. You can install the app in your android device and check out if it works. The app won't brick your phone as it does not touch your kernel, nor flash anything.

Note: Rooting your Android device will may results in void your Android phone’s Warranty. So root the phone after completion of warranty period or root it at your own risk.

Steps to Root Android Phone:

*. Download Framaroot app from any of the following links:

Framaroot-1.9.3.apk
Framaroot-1.9.2.apk
Framaroot-1.9.1.apk
Framaroot-1.9.0.apk

*. Install Framaroot from the apk file and choose install Superuser”  option inside Framaroot.

install superuser

*. Select any of the exploits that appears in the app and wait for some time. (Aragorn exploit works for me.)

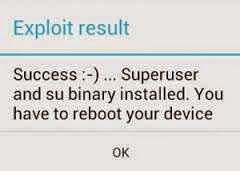
*. If you see a “Success… Superuser and su binary installed. You have to reboot your device” message then you have successfully rooted your phone.
exploit success

*.  If you see “Failed … Try another exploit if available”  message then try selecting another exploit. 

You can also unroot your device with Framaroot. Download Root Checker for checking your phone's root status.

List of Compatible Phones which can be rooted

    Compatibility for Qualcomm devices (Gandalf exploit only) :
    • ASUS Memopad FHD 10 LTE
    • Asus Padfone 1/2
    • Asus Padfone A66
    • Asus Padfone Infinity
    • Asus Transformer Pad Infinity TF700KL
    • Archos 50 Platinum
    • BLU Studio 5.3 S
    • BW T18+ (Fortis Evo)
    • Cloudfone Thrill 430x
    • Disgo 8400g
    • DNS S4504/S4503/S4502
    • FAEA F1
    • Gigabyte GSmart G1315 Skate
    • Gigabyte GSmart Rio R1
    • Google Nexus 4
    • Highscreen Spark/OMEGA Q/Blast/Strike/Boost
    • Hisense AD683G
    • HTC One S
    • Huawei Ascend G330D U8825D
    • Huawei Ascend G526
    • Huawei Honor Pro (U8950-1)
    • Huawei Premia 4g
    • Huawei U8815/U8816 Ascend G300/G301
    • Huawei U8825D Ascend G330D
    • Huawei Vitria Y301-A2
    • Huawei Y215
    • K-TOUCH TITAN S100
    • Karbonn Titanium S5
    • Kyocera Hydro Edge
    • Kyocera Hydro Xtrm
    • Kyocera Torque
    • Lenovo A600e
    • Lenovo A706
    • Lenovo S870E
    • LF-LTE3 (F260S)
    • LG Nitro HD
    • LG L1 II
    • LG L7 II P700/P710/P714/P715/P870
    • LG Lucid 2 (VS870)
    • LG Optimus Dynamic 2
    • LG Optimus F5 (P875)
    • LG Optimus F7
    • LG Optimus G E970/E975
    • LG Optimus L3 II E425
    • LG Optimus L5 E610/612/615
    • LG Optimus L7 II P710/P713/ P714/P715
    • LG Optimus L7 P700/Р705
    • LG Optimus LTE 2
    • MEDION LIFE P4013
    • Micromax A111 Canvas Doodle
    • Motorola Defy Mini XT321
    • Oppo Find 5
    • Orange Nivo
    • Orange Yumo
    • Orange Zali
    • Pantech Discover
    • Pantech Flex
    • Pantech IM-A840S Vega S5
    • Pantech Sky S5 A840S
    • Pentagram Combo
    • Phicomm i370w / i600 / i800
    • Samsung Galaxy Core i8260
    • Samsung Galaxy Express GT-I8730
    • Samsung Galaxy Win I8552
    • Sharp Aquos Phone SH930W
    • Smartfren Andromax U
    • Smartfren Andromax i2
    • Sony Xperia E C1505/Dual C1605
    • Sony Xperia L C210X
    • teXet TM-3204R
    • teXet TM-4677
    • Xiaomi Mi-2S
    • Yarvik Ingenia Compact SMP35-200
    • ZTE T83 (Telstra Dave)
    • ZTE V880G/ZTE V955
    • ZTE V9815 Grand Memo N5
    • ZTE Warp Sequent
    Compatibility for MTK devices (Boromir, Faramir and Barahir exploits only) :
    • A8 Alps
    • Acer A1-810
    • Acer A1-811
    • Acer B1-711
    • Acer Iconia A3-A10
    • Acer Liquid E2
    • Acer Liquid Z3
    • Alcatel 975N (Vodafone Smart 3)
    • Alcatel OT 4030D S'POP
    • Alcatel OT 8008D Scribe HD
    • Alcatel OT 997D
    • Alcatel OT Fierce
    • Alcatel OT Idol 6012X / Le Mobile Sosh / Orange Hiro
    • Alcatel OT Idol 6030X/6030D/6030H
    • Alcatel OT Scribe Easy 8000a
    • Alcatel OT Star 6010X
    • Alcatel OT Pop C5
    • Alcatel OT Ultra 6033x
    • Alcatel OT X'Pop 5035D
    • Amoi N828
    • Archos 40 Titanium
    • Arc Mobile 350D
    • ASUS Memo Pad HD 7
    • atab4w
    • AVUS A24
    • BEDOVE X12
    • Blu Dash 5.0
    • Blu Life Play
    • BLU ONE X
    • BLU Studio 5.0 / 5.5 / 5.5S
    • BQ Aquaris 5 / 5.7
    • BQ Elcano
    • Brondi Glory 2
    • Cat B15
    • Changhong z9
    • Charmpin (UTime) G7
    • Cherry Mobile Amber
    • Cherry Mobile Burst 2
    • Cherry Mobile Cosmos S
    • Cherry Mobile Cosmos X
    • Cherry Mobile Omega XL
    • Cherry Mobile Thunder 2.0
    • Chinese Star S7589
    • Chuwi VX1
    • Coolbox Quore v57
    • Coolpad F1 (8297)
    • Cube U39GT 3G (CubeTalk 9)
    • Cube U51GT C4
    • Cube U55GT (CubeTalk 79)
    • Cubot A890
    • CUBOT GT90 / GT99
    • CUBOT ONE
    • CUBOT X6 / P6
    • DAXIAN XY100S
    • Doogee DG200 Hotwind
    • Doogee DG350
    • Evercoss A7S
    • Excelvan ET704
    • Explay HD Quad
    • Explay infinity II
    • Explay Polo
    • Explay Surfer 7.32 3G
    • Explay Surfer 8.31 3G
    • Explay X-Tremer
    • Fly IQ440 Energie
    • Fly IQ441 Radiance
    • Fly IQ442 Miracle
    • Fly IQ443 Trend
    • Fly IQ446 Magic
    • Fly IQ450 Quattro Horizon 2
    • Fly IQ451
    • Gionee 868H
    • Gionee E7 mini
    • Gionee Elife E3
    • Gionee GN 708
    • Gionee Pioneer P2
    • GoClever Fone 570Q
    • GoClever Quantum 4
    • GoClever Tab M713G
    • Goophone N3
    • GSmart Aku A1
    • GSmart Sierra S1
    • GuoPhone G9002
    • Haier W718
    • Haipai I9389
    • HDC I9500/N9006
    • Highscreen Alpha GTX
    • Hisense U970
    • HKC Q79 3G
    • Hosin v70
    • Huawei U8836D G500 Pro
    • Huawei G610-U00 / G610-U20
    • Huawei G700-U10 / G700-U20
    • Huawei Ascend G730
    • Huawei Y320
    • Huawei Y511
    • HTM A6
    • HTM M1/M3
    • HUMMER H1+
    • iBall Slide 3G Q1035
    • IconBIT NetTAB Space 3G Duo
    • IconBIT NetTAB Mercury Q7
    • I-mobile series I-style 7.2
    • Inco Colossus II
    • INEW I6000+
    • iNEW V3
    • Intex Aqua HD
    • iOcean X7
    • iWING WTD2
    • Jiake JK 11
    • Jiayu F1
    • Jiayu G2
    • Jiayu G3S
    • Jiayu G4
    • Just5 Spacer
    • Karbonn A1 / A30 / A9+
    • Karbonn Titanium S2
    • Kata i3
    • Kata Venus 3
    • KENEKSI Beta
    • KingTopKt07
    • Kvd N3+
    • LANIX ILIUM S600
    • Lava iris 405 / 503
    • Lenovo A3300
    • Lenovo B8000-H
    • Lenovo 10.1" Tablet S6000
    • Lenovo IdeaPhone P700i
    • Lenovo IdeaPhone S720
    • Lenovo IdeaTab A3000-H
    • Lenovo IdeaTab S6000-H
    • Lenovo P770/P780
    • Lenovo S890, S720, S820, S920, A390, A850, A516, A656, A368i, A369i, A859
    • Lenovo S5000-H
    • Lenovo S6000-F
    • Lenovo Yoga 8 / 10
    • Le Pan TC802a
    • M-Pai 809T
    • M4tel SS1060
    • Mi354 "Spice Smart Flo Space"
    • Micromax A58
    • Micromax A89 Ninja
    • Micromax A90
    • Micromax A114 / A117
    • Micromax A115 Canvas 3D
    • Micromax Canvas 2 Colors A120
    • Micromax Canvas 2 Plus
    • Micromax Canvas 4 A210
    • Micromax Canvas EGO A113
    • Micromax Canvas HD
    • Mlais MX70
    • MoreFine S6 Pro
    • Motorola RAZR D1
    • Motorola RAZR D3
    • MSI primo 76
    • MyPhone Agua Iceberg
    • Mysaga C2
    • N800 Mini Note
    • Neken N6
    • NEO N003 Advance
    • Newman N1 / K18
    • Nexa Vega N4
    • NGM Forward Prime
    • NGM Forward Young
    • NGM Dynamic Racing GP
    • No.1 S7
    • Omate TrueSmart
    • Onda v819 3G tablet
    • OPPO Find Clover
    • Oppo find 5 mini
    • Oppo findway U7015
    • OUMEI X5
    • Overmax Vertis-01/01+
    • Overmax Vertis-02/02+
    • Pantech Vega LTE Ex (IM-820L)
    • Pearl Smartwatch AW-414
    • Philips W536
    • Philips W736
    • Phoenix Rockx1
    • PocketBook SURFpad 3
    • Prestigio Multipad 4 Quantum
    • Prestigio MultiPhone 4055
    • Prestigio MultiPhone PAP 3350/3400/4505/5044 DUO
    • Runbo x5 / x6
    • S09 W63 IP68
    • Sesonn N9200+
    • Sharp AQUOS SH837W
    • Shengda S4
    • Sky Vega A800S
    • Smartfren Andromax V
    • Star HD9000+
    • Star N8000
    • Star N9800
    • Star S5 Butterfly
    • Star S6
    • Star S9500
    • Starmobile Diamond V3
    • Starmobile Knight
    • Symphony Xplorer ZII
    • Tecno R7
    • TeXet NaviPad TM-7055HD
    • Texet TM-5277
    • THL T100S / T200
    • THL V12
    • THL W8 Beyond
    • THL W8S
    • THL W11
    • THL W100(S) (130711)
    • THL W200(S)
    • Tronsmart TS7
    • Ulefone u7
    • Utime U100S
    • Vonino Ego QS
    • Vonino Sirius QS
    • Xiaocai X9
    • Xiaomi Hongmi / Redmi
    • Xolo A600/Q700/Q800/Q3000
    • Zen Ultrafone 701HD
    • ZOPO 980/990
    • ZOPO C2 Platinum
    • ZOPO C3
    • ZOPO ZP910
    • ZOPO ZP300+ / ZP500+
    • ZOPO ZP900 Leader
    • ZOPO ZP950H
    • ZOPO ZP990+
    • ZOPO ZP998
    • ZTE BLADE G2 V880H
    • ZTE BLADE Q
    • ZTE BLADE Q MAXI / MINI
    • ZTE Kis
    • ZTE Leo S1
    • ZTE N986
    • ZTE Open
    • ZTE Roamer 2
    • ZTE V795
    • ZTE V880G/H
    • ZTE V967S
    • ZTE V987 Grand X Quad
    • Walpad
    • Walton Primo F3i / G1 / H2 / EF
    • Wiko Cink Peax 2
    • Wiko Darkfull
    • Wiko Darknight
    • Wiko Darkmoon
    • Wiko Iggy
    • Wiko Ozzy
    • Wiko Rainbow
    • Wiko Stairway
    Compatibility for Huawei K3V2 devices (Pippin exploit only) :
    • Huawei Ascend G615
    • Huawei Ascend Mate
    • Huawei Honor 2
    • Huawei MediaPad 10 Link
    Compatibility for Samsung devices (Legolas and Aragorn exploits only) :
    • Samsung Galaxy Core GT-I8262
    • Samsung Galaxy S Aviator
    • Samsung Galaxy Proclaim S720C
    • Samsung Galaxy Young GT-S6312/GT-S6310
    • Samsung Illusion SCH-I110
    • Samsung Lightray SCH-R940
    Compatibility for Exynos devices (Sam, Frodo, Legolas and Aragorn exploits only):
    • AT&T Galaxy Note 2 SGH-I317
    • Highscreen Explosion
    • Hyundai T10
    • Hyundai T7s
    • Impression 9702 (Exynos 4412)
    • Lenovo K860/К860i
    • Newman N2
    • Meizu MX2
    • Samsung Galaxy Camera EK-GC100
    • Samsung Galaxy Note 10.1 GT-N8000, GT-N8010, GT-N8013, GT-N8020
    • Samsung Galaxy Note 2 GT-N7100
    • Samsung Galaxy Note 2 LTE GT-N7105
    • Samsung Galaxy Note 8.0
    • Samsung Galaxy Note GT-N7000
    • Samsung Galaxy S GT-i9000
    • Samsung Galaxy S2 AT&T SGH-I777
    • Samsung Galaxy S2 Epic 4G Touch - SPH-D710
    • Samsung Galaxy S2 GT-I9100
    • Samsung Galaxy S3 GT-I9300
    • Samsung Galaxy S3 LTE GT-I9305
    • Samsung Galaxy Tab Plus GT-P6200/GT-P6210
    • Samsung Galaxy Tab 7.7 GT-P6800/GT-P6810
    • Samsung SGH-i997 Infuse 4G
    • T-Mobile Galaxy Note 2 T-889
    • Verizon Galaxy Note 2 SCH-I605
    • iBerry Auxus CoreX2 3G and CoreX4 3G
    Compatibility for Omap36XX devices (Gimli exploit only) :
    • Archos Gen8
    • Cliq 2 MB611
    • Coolpad Quattro 4G
    • Droid 2 (a955)
    • Droid 2 Global (a956)
    • Droid X (MB810)
    • LG Marquee LS855
    • LG P970 Optimus Black
    • Motorola DEFY+ (MB525 / MB526)
    • Motorola Droid PRO
    • Motorola Droid X
    • Motorola Milestone 2
    • Motorola XPRT
    • Parrot ASTEROID Smart
    • R2D2 (a957)
      If your device is not in the list, you may also try this and tell us if you get success. Enjoy rooted Android phones.

      Friday 10 October 2014

      Create your own Meme with customized text

      Social networking sites like Facebook and Google+ are flooded with different types of memes these days. These memes are in the form of text or emotions pictures. These memes are very much involved in the social viral activities and viral stories on certain topic. People use Meme as their daily conversation.

      We may wonder how these memes are created. For those who want to create their own customized memes here is one of the meme creation service http://memeful.com.

      memeful meme generator

      Memeful is very easy to use and free service to create memes with customized text.

      *. To create your own meme head over to the website http://memeful.com and select the available memes.

      *. Type in any text in the two text boxes provided and click on Create or you can also upload any picture from your PC and then enter text and create a meme.

      creating meme

      That’s it now you can save the created image or share it directly on the social networking sites from the social links provided. You can also try http://imgflip.com/memegenerator for meme creation.

      Friday 3 October 2014

      How to Delete and Turn off your Google Search History

      Every person likes to search on Google at any moment whenever he/she needs any type of information from the web, Google is a guide for anyone who is surfing on the internet. But most important thing that we are not very well aware of is that Google stores every single word that we search on their search engine. Every query that you search on Google and all the websites that you visit from the Google search results are anonymously recorded by the search giant. 
      google history logo

      According to Google, the recorded search data is used to provide you with better search results and recommendations across Google’s products. But most of the people are not that much aware of the fact that Google is storing their personal search queries and visited URL’s.

      But don’t worry, Google does allow you to delete your search history. You can delete entire search history or some portion of the search history. 

      How to Delete your Google Search History

      Following steps are simple enough to know more about deleting Google history.

      *. Go to https://history.google.com/history and login with your Google account.

      *. Now select the check box beside Remove items for removing history. You may select the specific search query or the entire history that you want to delete.

      remove google history

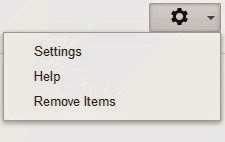
      *. If you want to delete recent history from last hour or last week you can do so by clicking on the cog icon and selecting Remove items.
      history settings

      That’s it, now all your Google search history will be deleted permanently. however Google will still keep on recording your search queries and websites visited, until you turn this feature off.

      How to Turn Off the Google Search History

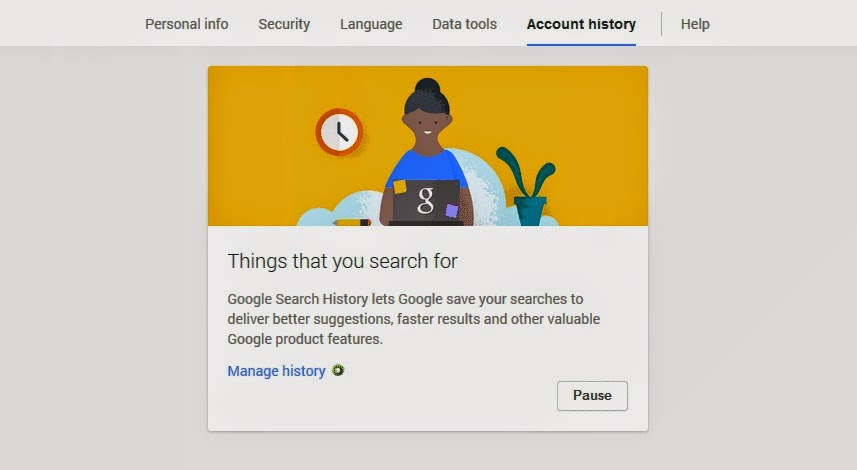
      Go to the Google search history page https://history.google.com/history/settings or click on the cog icon and select Settings and click on the Pause button to permanently turn off the Google search history.
      turn off google history

      After this Google won’t remember your search history. You can allow Google to track your history by clicking on the Start button anytime by the same way.

      Sunday 28 September 2014

      Recovering data from Scratched or damaged CD/DVD’s

      You have noticed that many of the time your CD/DVD’s scratched due to not using them for a longer period of time. All of us mostly depend on cloud data storage and USB drives or hard drives due to their portability and last longer ability. CD/DVD’s mostly have the data that is very old but due to the importance of the data we have to keep them in good place, but they damaged in any case and data recovery is the most complicated problem for ourselves from them.


      DVD

      For this problem we have found solution. This might help you recovering data from your CD/DVD’s in easier way. Here we are suggesting two easy to use programs which can be used to recover data from damaged CD/DVD’s.


      Roadkil’s Unstoppable Copier is a simple, small and easy to use program which is mainly designed to recover data from scratched or damaged CD/DVD’s.


      dvd copier roadkils unstoppable

      Every time when you tried to copy any files from scratched CD/DVD’s you may encounter numerous errors such as “Not readable” or “Corrupted”. This is the reason why Roadkil’s Unstoppable Copier here to help you. It is a free program which you can download from here.


      Another program is CD Recovery Toolbox which also support for the new format Blu Ray disc’s. This utility is capable of recovering data from both scratched, damaged or corrupted optical discs. You can download it from here.


      recovery toolbox cd copy

      New and modern gadgets overcome the use of CD/DVD’s but still they’re used for storing important backups. So, hopefully if you have facing problems of recovering data from damaged CD/DVD’s then this post will help you….

      Thursday 25 September 2014

      How to know if your E-mail account compromised in Cyber Attack

      You have noticed that in the recent few years cyber crime is increased a lot. Everyday we hear news about cyber crime or hacking through mail servers, etc. Even the top websites like facebook, twitter, gmail, yahoo etc. also get hammered by the cyber criminals to get the sensitive information of the users. Personal information on these sites open to these criminals can cause vey serious issues to ourselves.

      Cyber attack

      In the few days of time you may heard about stealing of personal photos of Hollywood celebrities by iCloud hacking and sharing it on internet. This is a major kind of issue. It proves that although you delete your personal information from the web it may recoverable by these cyber criminals. So be alert is the only solution don’t reply to unknown persons or mails in your inbox.

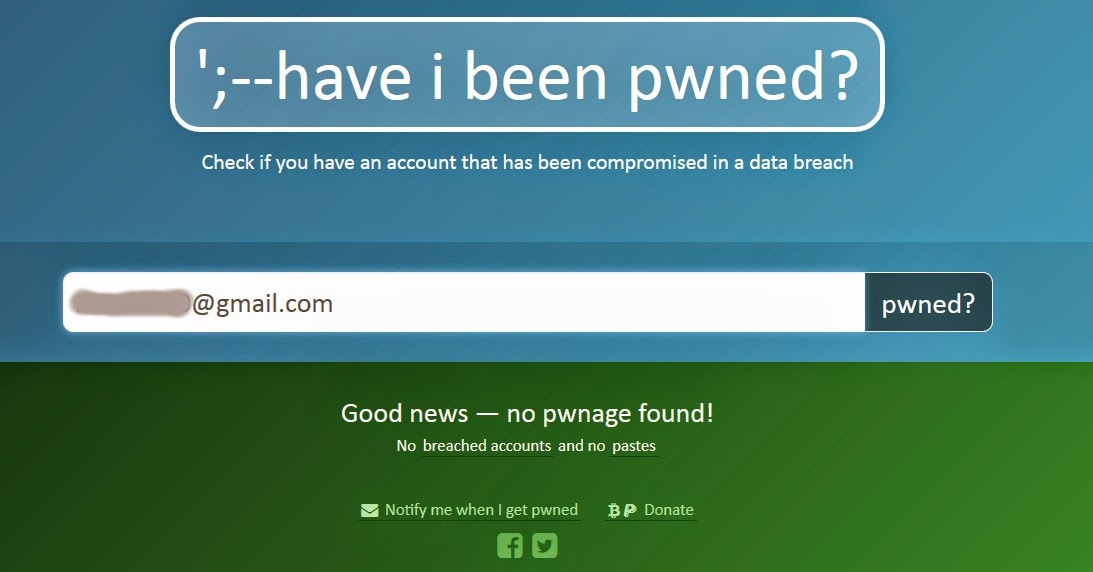
      But good news is that you can now know about your e-mail status in cyber attack. The website https://haveibeenpwned.com, let you know about your account status in a cyber attack. What the service does is, it collects the breached data which have been made publicly available and when you enter your email id, the service compares it with its database of compromised accounts and notifies you know if your email account is found in any of the recent security breaches.

      i have been pwned

      In another recent news you may heard that millions of e-mail accounts were hacked and the mail providers suggested to change the credentials of the users. So this service is very useful to let us know about our mail account. The site https://haveibeenpwned.com only stores the e-mail id and usernames of the compromised accounts. If you have more doubt, check out their FAQ page for more details.

      Make sure from now that you check if your account has been compromised and do let your friends know about this service as well.

      Tuesday 16 September 2014

      How to zoom into Videos with VLC

      Zooming into images is a normal work that you do everyday, anywhere, on your PC or your mobile but do you know you can also zoom into video files. Definitely you’ve noticed that you need to zoom into video files while watching high quality movies or just while watching any video for make yourself able to view smaller parts of the videos behind it.

      This difficulty can be overcome. Yes, and it’s simple too. You know how to do it? Well you don’t have to be a scientist for this, you can do it by using your VLC media player, isn’t it cool to have such a feature.

      Steps to make a zoom into videos

      Steps are very easy to follow, just follow below steps to do your work.

      *. Open any video file with VLC media player.

      *. Now press Ctrl+E to open Adjustment and Effects window or click on Tools from menu and select Effects and Filters.

      *. Click on Video Effects tab and then click on Geometry tab.

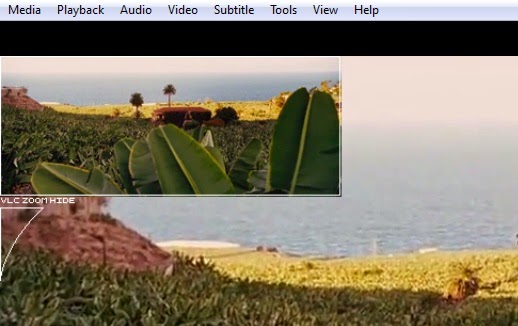
       interractive zoom vlc

      *. Now just mark the checkbox near Interactive Zoom and you’re done.

      *. You will see a zooming option available on your VLC at left upper corner, using that option you can easily make a zoom in your videos like you increase the volume.             

                                   VLC zoom video
      Isn’t it so much easier? definitely it is...!. Enjoy zooming videos and keep connected with us for more such valuable tricks.

      Saturday 13 September 2014

      How to save news feed on Facebook

      Nowadays everyone has a FB account and they’re very much familiar with news feed on facebook. Sometimes there were lots of posts by our friends and we don’t have time to read it completely and also some valuable posts shared by different pages that we need to be saved on for later reference. But don’t you worry for that now, because facebook introduces a new option to save your news feed on your facebook account and you may able to view it later whenever you need it.

      Where is save option on fb/Facebook?

      Finding a save option is not much difficult on facebook. You have to login to your facebook account and you will see lots of news feeds or you can say posts by different users or pages.

      You have to point out the post you want to save and after your decision to save a post just click on the small drop down arrow icon from top right corner of the post and and you will see a option to save. Click on that and your post will be saved for later references.
      Save news feed

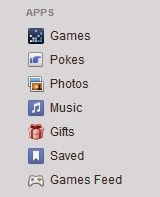
      You can access your saved news feeds by vising the link https://www.facebook.com/saved or you can also have an option to click on the saved option which is available on left side in the apps or favourites section on the home page.

      Saved option

      We know you should enjoy this simple tutorial. Keep following us for some more….

      Wednesday 10 September 2014

      Find out most shared stories on Social Network with Buzzsumo

      If you are eager to know about the trending stories on the social media then Buzzsumo is for you.

      Buzzsumo Trending Content

      Whenever we make a search on search engines it gives results according to their algorithm but these results may not be latest results they may be older because search engines not updated in real time so we don’t get real time results. But by using social network this can be easily bypassed, because when any latest story liked or shares on the social network it becomes a popular source of information. As likes and shares increases the popularity rank of the story also increases. So the same activity of social sites captured by Buzzsumo and present you the relevant results.

      What is Buzzsumo ?

      You may be confuse with all this, so let me clear you that buzzsumo.com is a service like a search engine which provides you up to date information about on a specific topic, trending stories on the social networking sites.

      You have observe that social network becomes the very popular and faster medium in recent times to share information than traditional news sources like television or other news broadcasters. So can take help of Buzzsumo to find the trending news or story on any topic.

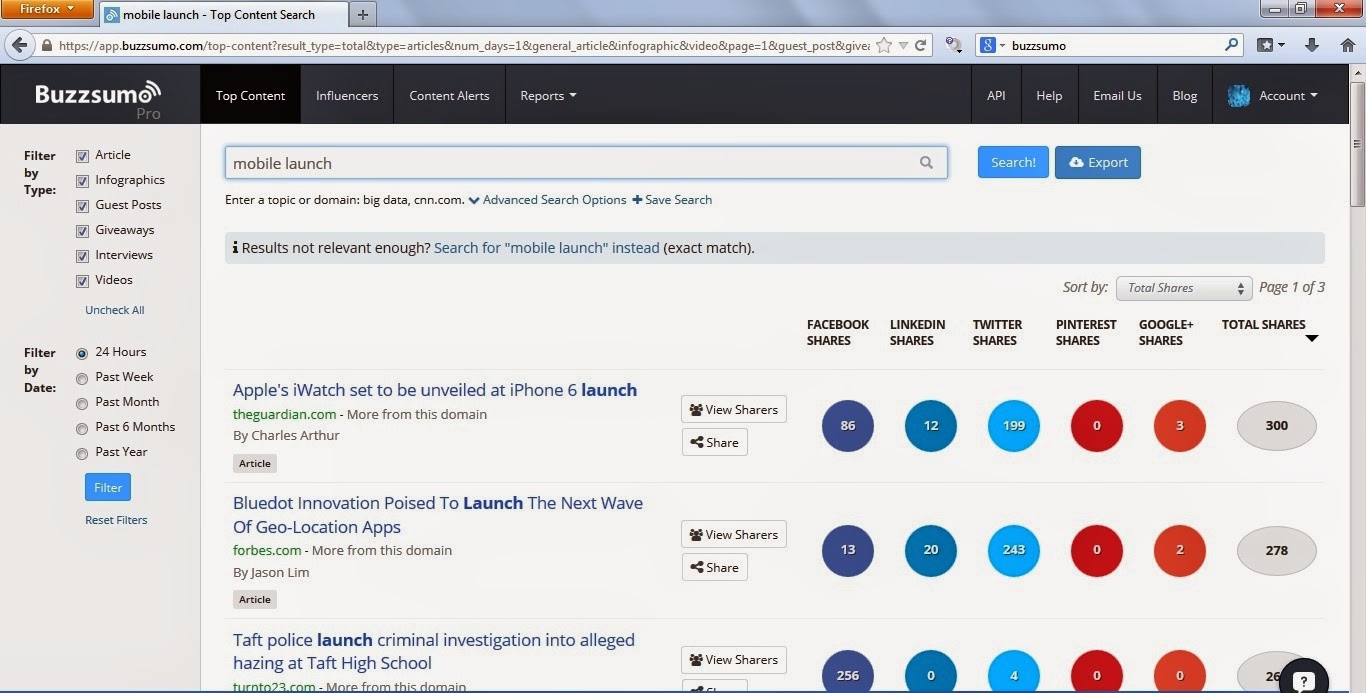
      You have to just enter two three words relevant to the topic for which you want to search for just like a search engine or you can also enter URL of the social site and the results will be available quickly.

      Search results Buzzsumo trending content

      If you need to increase the relevancy, you can even filter Buzzsumo results as Article, Videos, Infographic, Guest posts, Giveaways etc. You can also filter results by their time period.

      Buzzsumo is available for free by its basic plan you can also buy premium plans for better results.


      Just sign up on buzzsumo.com and start searching for trending stories now….

      Sunday 7 September 2014

      Troubleshooting Guide to Windows 7,8 or 8.1 installation

      Did you experience some problems during Windows installation? If yes then this guide may help you better understand Windows installation.

      Microsoft build Windows installation procedure with easy to use user interface that is very easy to use for any normal user. But sometimes due to some reasons it may cause some errors or troubles that makes installation of Windows somewhat complicated. Every normal computer user experience such type of problems and not able to solve them easily but here you will able to solve your problem.

      If you have installed any other operating system on your system or want to dual boot Windows with Ubuntu or other OS then you have to face some problems related to partition. Before we begin you should know about the commonly used partitioning methods that are used by different systems or OS.

      There are two types of partitioning methods that are used by different operating systems. First one is MBR and another is GPT. Now modern Windows operating system uses GPT partition only and some old Windows version and Linux distribution operating systems use MBR partition scheme.

      What is MBR and GPT?

      MBR that stands for Master Boot Record is the old standard for managing the partition in the hard disk. The MBR resides at the very beginning of the hard disk and it holds the information on how the logical partitions are organized in the storage device. MBR uses 32-bit to record the partition, each partition can only go up to a maximum of 2TB in size. MBR is the only place that holds the partition information. If it ever get corrupted , the entire hard disk is unreadable.

      GUID Partition Table (GPT) is the latest standard for the partitions of a hard disk. Unlike MBR that limits each partition to only 2TB in size, each partition in GPT can hold up to 2^64 blocks in length because it uses 64-bit. In Microsoft Windows, that size is limited to 256TB.

      Steps to install and handle trouble?

      Now you are somehow familiar with basic partitioning schemes. So now let us start the procedure of Windows 8 installation.

      *. Make a bootable DVD or USB pendrive with Windows 8, 8.1 setup and restart your PC to make your system boot from external device i.e. DVD/USB pendrive.

      *. After booting you have to normally choose the language, timezone and keyboard layout.

      Wnidows 8 installation step 1

      *. Then click on install now and accept terms and conditions as you usually do.

      Windows 8 installation step 2

      Windows 8 installation step 3

      *. Now you will be presented with partitioning wizard. If you have a valid GPT partition scheme then you can directly choose next and follow the instruction but if you are facing problems with partitioning scheme like as following screenshot then follow the next step.
      Windows 8 installation step 4

      *. Press Shift+F10 and a Command Prompt window will appear.
      Enter the following commands one by one:

         
      DISKPART
      LIST DISK
      SELECT DISK #

      (# is the number you saw in the previous step.)

      CLEAN
      CONVERT GPT/MBR
      (You may use GPT or MBR it depends on your partition type if it is of GPT then yoy have to use MBR and if it is MBR then GPT)
      CREATE PARTITION PRIMARY SIZE=50000

      (The size is in MB, so enter the amount that you want to use for your main system partition. i.e. C:\ drive)

      FORMAT FS NTFS LABEL "SYSTEM" QUICK

      Windows Diskpart cmd
      *. After this click on refresh and then select the partition you just created and click on Next.

      That’s it…! Now follow the wizard for installation and your Windows 7,8 or 8.1 OS will be installed without any trouble.

      Thursday 4 September 2014

      How to change Startup sound of Windows

      Are you a long time Windows user? Surely you are not new to the Windows OS. Most of the computer users make you of Windows OS.

      Some or all the users were annoyed with Windows Startup sound. Windows doesn’t provide default setting to change the Startup sound. But you can change your Windows system’s Startup sound with some methods. First method you can use to change startup sound of Windows is by hacking or you may say tweaking registry setting but it is very complicated for a normal user.

      There is another method to change the startup sound with the help of a free program named Startup sound changer. This is very is to use program and you can easily change your system’s startup sound.

      How to change Startup sound?

      *. Download Startup sound changer from here.

      *. Run the downloaded file with administrator privileges. You will be presented by the following interface.

      startup sound changer
       *. Now click on Replace and select the .wav audio file that you want to set as the default startup sound for Windows.

      *. Finally click on play to hear the changed sound.

      Note: The file size should be less than 1 MB and the file format should be .wav.


      That’s it! The startup sound for Windows would be changed. Restart your computer and you would be able to hear the new startup sound set by you. In case you want to revert back to the default startup sound, simply click on Restore.

      Monday 1 September 2014

      How to hide Drives from Windows Explorer

      Sometimes you have a private data that you needs to be hidden so you use hidden feature of Windows to hide some private files. But if you need to hide entire drive then you may face some difficulties. You are very well aware of hiding files in Windows but, did you know you may also hide your drives from appearing in the Windows Explorer.

      Hide drives

      For protecting your privacy in this post you will able to know about hiding drives in Windows.

      How to hide drives ?

      There are certain tricks by which you can hide drives from Windows explorer but from these tricks you will have to edit windows registry. For any advanced Windows user this is an easy task but for a normal user it is somewhat tough.

      Fortunately a tool that doesn’t needs to tweak registry is available for you. This tool is NoDrives manager which is a free and simple to use and and can help you hiding your logical drives in Windows Explorer. But note that if you type the name of the drive in the Windows Explorer then it will be shown to you, so keep your drive name private for make it inaccessible to others.

      Following steps will help you more.

      *. Download and install NoDrive manager from here.

      *. Run NoDrive manager and select the drive you want to hide and click on Save changes to hide the drive.

      NoDrives manager run

      *. Now you will be prompted with a dialog box instructing you to restart your PC or log off and log in it again for the changes to take effect.
      drives hidden successfully

      *. Now just restart or log off your system and your drives will be hidden.

      *. To recover hidden drives uncheck the checked hidden drives and click on save changes and restart or log off your system.

      Along with the drives on windows, the tool can also be used to hide CD / DVD drives. You can also assign a password protection to NoDrives Manager application for your security after assigning password nobody can access the application or hide or unhide drives without your permission.

      That's it from the easy tutorial for hiding drives from your Windows explorer to protect your private data from others. Hopefully you should enjoy doing it.

      Thursday 14 August 2014

      How to find out details of website for safe browsing

      Everyday we deal with different websites for different kinds of information. Mostly we don’t care about a website and don’t know how safe it is to browse. Sometimes some websites may be infected with suspicious content that can harm your system. Although you trust the site you must identify about it’s protection for your own safety.

      In the past it is very easy for the user to find out the harmful websites because of the poor designing of websites and annoying notifications but nowadays with the mastered improvement in the designing of such harmful websites may confuse anybody and they may not easily detectable for a normal user.

      Fortunately for a user there is an easy solution in the form of a browser extension named WOT.

      What is WOT ?

      WOT is a browser extension that is available for all popular browsers like Mozilla Firefox, Google Chrome, Opera. WOT notify users about a website whether it is safe to browse or not. Once installed, the extension icon appears on your browser and changes color of it according to ratings provided by millions of users for that website around the world.
       
      WOT Rating box

      Download links for WOT

      For Google Chrome
      Download Link 

      For Firefox
      Download Link

      For Opera
      Download Link

      If a website is harmful, the extension will show a red light and in case it is completely safe, it will display a green light. 

      facebook screenshot

      Apart from the browser icon WOT also displays a icon near search result links to alert you before you click on that link. It’s also a very amazing feature of WAT that help you protecting yourself before clicking any link.

      google search
      Being an experienced web user or a newbie to the Internet all the users can protect themselves with this extension. So enjoy safe browsing on the Internet.

      Monday 11 August 2014

      Identify details of song used in YouTube video

      All of you watch lots of videos on Internet and mostly YouTube as it is the most popular and amazing video sharing community that powered by search giant Google. Lots of the time when we are watching different videos on YouTube there are certain songs or music included in the background of videos but we didn’t able to understood from where it was taken. 

      Mostly when the popular artist’s song or popular music in the background then it’s easy to find out the details but the music of certain advertisements and random user content won’t be find out easily. This kind of difficulties can be overcome now.

      You don’t need to be worry for this now because here is the solution for you. For solving this problem you have to give a try to Audentifi.

      Audentifi is a audio identifying service for YouTube which can help you identifying unknown audio from YouTube videos.

      How it works ?


      Audentifi is a simple and easy to use service. You have to just copy and paste the YouTube URL in the input box provided and click on Identify songs.

      youtube song details

      Audentifi will now scan the song used in YouTube video and if it is identified by Audentifi then it will show the song and artist name. Also you will be presented with the link to purchase the song from Amazon or Itunes. Alternately, you may search for that song on Internet to download it for free.

      Since it is a new service we can’t say it a perfect service but it is very good service. Most of the cases it identifies the audio which is unknown to us.

      Friday 8 August 2014

      Universal Viewer: Open different format files with single program

      Different format of files needs to be open by a particular program, for example if you are playing any mp3 format audio then by default it open in Windows Media Player and a pdf document needs to be open by Adobe Reader. But think about a situation where you have to open certain file with some kind of file format and you don’t have the software to open that file so, what you will do? Obviously you will search for that software on the internet or take it from your friend or relative. But that is a very time consuming process, isn’t it! But the solution for this is Universal Viewer.

      What is Universal Viewer ?

      Universal Viewer is a software which may help you in such situations where you need to open specific file instantly and you won't have the software to open it. It is just one program that you will need to open different kinds of files with ease. You can open different file format files with this software if you don’t have the program to open the file. Universal Viewer supports different file formats such as .doc, .pdf, .mp3, .avi, .mkv, .xls, .ppt, .flv and lots more.

      How to use it ?

      It is very easy to use software program. You can download it from here and the follow the normal installation procedure to install the program and you are ready to go.

      Universal Viewer open file
      Whenever you need to open any file you can open Universal Viewer and open the file from file menu.

      OR

      Right click on any file that you want to open and select Universal Viewer and your file will be opened.

      Right click Universal Viewer
      That's it! it's nice to have a program like this isn't it? It minimizes the work of downloading extra softwares.

      Popular Posts