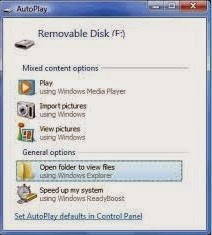
Windows users should be aware of the Print Screen option available in Windows which allows users to capture their working screen. But whenever you want to see the captured image you have to paste it into any type of image editor such as MS Paint and then you can save it.
But you can save it directly into your desired directory. Don't know how? You will able to know it from following post.
How to save screenshot automatically
For this you need a small tool named as Screen Sniper. It is very small application and will not consume more memory of your system.
Follow following steps to get your screenshot image in your desired folder.
*. Firstly download Screen Sniper from here.
*. After installation you will see Screen Sniper icon in your tray.
*. You can right click on it and click on Show Screen Sniper, for selecting the directory in which you want to save your screenshot and also the hotkey (default is PrtScr & you can customize it). Also you can change the format of image you want to save.
 *. Now you are ready to take a screenshot. As you do previously just press the PrtScn button on you keyboard and within a second your screenshot image will be saved into the folder you selected.
Just enjoy with this small and useful post. Stay connected with TechAntic for more tips.
Recently most of the Windows 8 and Windows 8.1 PC were suffered from a problem of limited or no connectivity message shows up that is very annoying for any user.
This post will guide you to resolve limited or no connectivity message in Windows 8 Computers.
You may apply this guide if you have this problem with Wi-Fi connection, if you are connected to internet through LAN and we will happy to know about how you resolve your problem by using this guide.
One of the following methods will solve your problem.
*. Press Windows Key+ x+a to open command prompt directly or do this manually, but remember that you should open command prompt as administrator.
*. Type following command in the command prompt window
netsh int ip reset C:\resetlog.exe
*. Restart you computer to and if everything works well your problem will be solve.
If above process doesn't work then follow another method as given below.
- Change Wi-Fi Power Management setting
*. Press Windows Key+W and type “Network and sharing center” in the search box.
*. Click on “Network and Sharing Center”
*. Double-click on your Wi-Fi or LAN connection name and select properties.
*. Now, in the Properties window, click on “Configure”.
*. In the next window, click on Power Management Tab.
*. Now, uncheck “Allow the computer to turn off this device to save power” box (if it is checked).
 *. Click on OK and Login or Reboot your system to save the changes.
This is the most common method you may use to fix limited connectivity problem. Just disconnect your LAN network cable from your PC and modem. On Wi-Fi this will not work.
If all the above methods doesn't work then the below method will solve your problem. Mostly this will solve the issue.
*. Open command prompt in administrator mode.
*. Type all the three command given below one after another
netsh int tcp set heuristics disabled
netsh int tcp set heuristics disabled
netsh int tcp set global rss=enabled
 *. Now Restart your computer to complete the process.
That's it ! Your problem of limited or no connectivity in Windows 8 and Windows 8.1 will be resolved. Keep following our posts to get updated with tips and tricks.
Sometimes you have to delete some files permanently from your computer. You may delete files from your computer and also from Recycle Bin but they can be recoverable by using some recovering softwares. But if you want to permanently delete files and folders in a way that they will unrecoverable with any of the recovery software, so you can do this by using a software tool named Eraser.
Eraser is a third-party tool and it is a free and open source windows security tool which allows you to permanently delete files and folders from Windows PC.
It completely removes all the sensitive data present on your computer’s hard drive.
Features of Eraser
*. It works with all the drives on your Windows systems.
*. It erases files, folders and their previously deleted counterparts.
*. It works with an extremely customizable Scheduler.
How to Use Eraser
*. Download and Install Eraser from here.
*. Now, whenever you have to delete a file or folder, right-click on the file or folder and instead of clicking on Delete, click on Erase > Erase and the file or folder will be deleted permanently.
 *. Another option is Erase on Restart, selecting this will delete your file when you restart your system. It can be useful if you delete any file accidently then it can be recover before you restart your system.
Here is another trick for you to convert any video to mp3 file format using VLC media player. You don't need any kind of third party software for this you can do it with your VLC media player.
VLC is comes with built in video to mp3 conversion feature. You can also convert video files into other video and audio formats.
How to convert Video to mp3 using VLC
You can convert video to mp3 using following steps:
*. Open VLC media player and click on Media from the menu and select Open Multiple files option.
*. Now click on Add to add a video file.
*. Here you have to add a video file which you want to convert to mp3 format.
*. Now click on a small arrow beside Play and select convert from the drop down list.
*. After that you have to select the conversion format, in this case mp3 and the destination where you want to save your converted mp3 file.
*. Now your conversion process will start in will and you can see the converted mp3 file on the location that you selected earlier.
That's it, you have converted video file to mp3 file format. Enjoy with the tricks and keep visiting for further more updates.
Not Genuine Error is very common among most of the Windows users if they are not using a genuine version of Windows 7 or other version.
Windows will show a message like "This copy of Windows is not genuine" at the bottom of desktop in every few minutes. This is due to the Windows genuine checker that checks whether the installed version of Windows is genuine or not.
How to make Windows 7 Genuine
Follow these following simple steps to fix this error of not genuine Windows.
Following two methods will solve your problem.
*. Open command prompt as an Administrator.
*. Now type slmgr -rearm and press Enter and wait for execution.
*. A dialogue box will appear asking you to restart your system. Click OK to restart your system.

*. Now when you restart your system you will not get an error of not genuine Windows.
*. Download Remove WAT Tool from here in Zip file format and Extract it.
*. After extracting it, Right click on “RemoveWAT.exe” and select run as Administrator.
*. Now click on Remove WAT and then click on OK to confirm.
*. Restart your Windows 7 PC and that's it! You fixed the error of not genuine Windows.
Use any of these methods to solve your problem and enjoy using Windows without an error.
Most of the time you need to cut mp3 songs in smaller parts for that you can download any third party softwares but these softwares are costly and more softwares can slow down your computer. Everybody uses VLC media player as it is the best media player on Windows. We will use the power of VLC to cut mp3 files without any third party software.
How to cut mp3 Songs using VLC
*. First of all if you don't have VLC media player you can download it from here.
*. Now click on Media from menu and open the mp3 song you wish to cut.
*. Once you have selected song, click on View from the menu and select Advanced Controls.
 *. After selecting Advanced Controls you will see a red icon on bottom of the VLC player.
*. Now select the beginning point by dragging the slider and click on red button to begin recording and the song will be recorded. Now to stop recording you have to click on the same red button.
 *. That's it! You have successfully cut the and saved mp3 song. Normally it automatically stored in C:\Users\your_username\Music (For ex. C:\Users\Dell\Music).
Note that it may be stored with .mp4 file format so don't worry just change the file format to .mp3.
It is very easiest way to cut any mp3 song without any third party software. So enjoy with the power of VLC and keep visiting for more interesting post.
Mostly everyone use PDF format documents to share their files. Because of their portability they are most popular and you can also use them on your smartphones so that they becomes even more portable. For some secure data you may apply password protection for the PDF file. But when forgotten password or you want password for any important PDF document, here are some tools that will help you in recovering password.
Aimersoft PDF Password Remover Online
This is a best tool for unblocking password of PDF files online and you don't need to install anything on you computer. With this tool you can unlock PDF files online. Just visit the link and click on upload and upload password protected PDF file. You can also unlock multiple files at simultaneously.
PDF unlock Tool by Estelar
This is very useful tool to unlock PDF files. After installing this software you need to provide password protected file to it and it creates another copy of the file by removing password protection from it.
PDF Mate Free PDF Merger
 PDF mate is a free PDF unlocking tool and comes with some useful features. Apart from unlocking PDF files, it also ha PDF decrypter, PDF merger, image to PDF converter, PDF splitter and much more. It also support editing, copy and printing of PDF files.
You can use these tools to unlock your PDF password protected files easily can avoid losing your important data.
PDF mate is a free PDF unlocking tool and comes with some useful features. Apart from unlocking PDF files, it also ha PDF decrypter, PDF merger, image to PDF converter, PDF splitter and much more. It also support editing, copy and printing of PDF files.
You can use these tools to unlock your PDF password protected files easily can avoid losing your important data.
 In the previous post we have seen about Tor and how we can stay anonymous on the Internet. But in case it is blocked by your network administrator then how to unblock it ? Don't worry here is the solution for that problem.
Reason to block Tor
*. Due to the rising popularity of the Tor application, lot of colleges, companies and organization started to block even Tor.
In the previous post we have seen about Tor and how we can stay anonymous on the Internet. But in case it is blocked by your network administrator then how to unblock it ? Don't worry here is the solution for that problem.
Reason to block Tor
*. Due to the rising popularity of the Tor application, lot of colleges, companies and organization started to block even Tor.
*. They mostly block access to all the publicly known relay servers. If network administrator blocked access to these relay servers then Tor would stopped working and you would not be able to connect to any blocked website on the Internet.
*. You can see complete list of Tor relay servers on the Vidalia Control Panel by clicking on View the Network button.
How to unblock Tor
If Tor relay servers blocked, then there are Bridge Relays come to the rescue. Bridge Relays are Tor Relay servers (Onion routers) that are normally not published in the public network list. They are hidden servers which are unknown to anyone of us and even the network administrator and so that they would not necessarily blocked.
To find Tor bridge Relay servers or Tor Bridges there are two ways as follows:
*. Visit to the webpage https://bridges.torproject.org and click on get bridges you will able to get information about some new Tor bridges.
*. If the above webpage is blocked then you may request for Tor bridges by email. For this send an email to bridges@torproject.org with the line get bridges in the body of email and make sure to send this email by your Gmail or Yahoo account because any other email account will not be accepted.
Within few minutes for should receive a reply containing some bridges that you can use. But sometimes this method doesn't work, you can use other devices like mobiles phone to access the webpage and get the bridges if Tor webpage is blocked in your organization.
Once you have received Tor Bridges information you need to configure the Tor application to use these new bridges.
To do this open Vidalia Control Panel > Settings > Network and select the option My ISP Blocks connection to the Tor network. Now you will be presented by a box below, where you can add IP addresses of the new Tor bridges. It is a recommendation for you that add as many bridge as you can to make it harder for your college, company or organization to block you.
Some network administrators also block the various ports that Tor uses for communication.
In such case, it is possible to force Tor to use Port 80 and Port 443 for all its communication. Port 80 and 443 are normally not blocked because these ports are the default ports that are needed for Internet communication. To configure this option go to Vidalia Control Panel > Settings > Network and select the option My Firewall only lets me connect to certain Ports.
Mostly this will resolve the issue of blocking.
So, just enjoy with this post and keep visiting for more tips.
Everyone in the world wants to browse the Internet anonymously. You have different ways to stay anonymous on the web like proxy servers, VPN servers, etc. but sometimes most of the proxy servers are blocked in public place where you want to access the Internet.
For this you have one option other that proxy sites i.e TOR.
What is TOR ?
TOR which stands for The Onion Router is a free software that is the best software for anonymity, privacy and unblocking websites.
TOR has thousands of servers in different parts of the world through which user's data routed and tunneled in encrypted format with the intention of keeping it completely anonymous.
It not only protect your privacy by keeping you anonymous, it keeps your communication on the Internet completely secure. It can be downloaded free of cost from https://www.torproject.org.
How TOR works ?
When you want to connect to the secure and anonymous network you first need to install TOR on your computer. When you have configured your browser to connect to the Internet through TOR and once TOR receives your request to connect to the domain name (For ex. www.google.com) that you want to connect, it will first connect to the TOR directory server and download a list of available TOR relay nodes (i.e. onion routers) that it potentially connect to.
TOR will now create a secure and encrypted network between you and the domain you want to connect to and route the connection by randomly selecting onion routers one after the other.
TOR always connect to three randomly selected onion routers in any part of the world before connecting the user to the destination system, hence it ensures the anonymity of the user. TOR always an advantage over the poxy servers by ensuring that it always connect to three different onion routers and on the other hand proxy routed through only a single system.
Once TOR circuit has been created, it will continue to be used for all the connection for 10 minutes or so, after which all new connections will be given completely new TOR circuits. It is also possible to change TOR's circuit sooner than 10 minutes if needed and in this case your identity also changes on the Internet.
How to use TOR ?
*. Download TOR Browser Bundle from here.
*. After downloading it can be extract anywhere on your computer or you can use it by extracting it on your USB pen drive. To launch TOR double click on start TOR Browser icon.

*. After you launch TOR you will be presented the Vidalia control panel and TOR will connect to its directory server and download a list of TOR onion routers. and then try to establish a secure and encrypted connection. As soon as secure Tor connection established the Mozilla Firefox browser window will automatically open.
*. The Firefox window that opens will also say Congratulations. Your Browser is configured to use Tor.
*. You can check your connection for anonymity by visiting http://www.whatismyipaddress.com.
*. Note that only the Mozilla Firefox Browser which automatically opens will work with TOR and all the other installed applications and browsers will not automatically connect to TOR.
If your college or organization block access to the Tor project website then you can download it by email also. To download it from email send an email to gettor@torproject.org and make sure you typed help in body of email and they will reply you with the instructions to download Tor and if you are using Windows then you have to reply them with keyword windows in the body of email.
Enjoy safe, anonymous and secure browsing on the Internet.
Probably everyone will have to suffer from the problem of Shortcut in USB pen drives or flash drives.
It can be very dangerous if you have any important data in the USB pen drive or flash drive. You have to format it for removing shortcut and all the data lost by this process.
But here is a solution for this problem. It is very easy and simple process to remove the shortcut virus.
It mainly causes due to some malware attack and it generates Autorun.inf file which converts all the files and folders into shortcut.
How to solve the problem ?
Apply following steps to solve the issue
*. Attach the USB pen drive or flash drive to the computer.
*. Press Win+R to open the Run command processor and type cmd to open Command Prompt.
*. Now type attrib -h -r -s /s /d f:\*.* and press Enter. Here f: is the drive on which the USB pen drive or flash drive is attached.
*. That's it now you can see all your files and folders as it is in the USB pen drive or flash drive.
You want more security for your internet browsing and want to surf the web anonymously then here is the solution for you. The Tails OS which will give you anonymity in browsing the web.
What is Tails ?
Tails is an operating system which is build for anonymous surfing of the internet. It can also be use to bypass some restrictions that have been implemented by local system administrator. (for ex. the security firewall in colleges, offices and other public places)
It is a free and open source licensed OS that means you can use it absolutely free.
It is bootable from live CD or pen drive or SD card. Tails uses Tor to provide users with secure encrypted anonymous access to the Internet.
Steps to install Tails
*. The first step to download the Tails OS from their official website here. It's latest version is approximately 980 MB. If you want to install it using pen drive then you also need Universal USB installer. You can download it from here. It will allow you to install Tails on the USB pen drive and make it bootable.
Use formatted pen drive for successful installation.
*. Plug in your USB pen drive and start the Universal USB installer software. After it's installation it will ask you to choose the Linux Distribution you wish to install, select Tails and then choose the path of the downloaded Tails OS .iso file and select the drive on which you want to install. Take a look on the warnings that will pop up after pressing OK about your data on the pen drive. The complete installation process takes few minutes but not more as other OS needed.
*. Once installation is over restart your computer by pluging in USB pen drive. Before Windows starts booting, quickly press Esc, F12, F2 or other keys that your system specified for accessing BIOS settings. Look for the Boot priority or Boot sequence and make sure USB device boot priority should be higher. After that save the setting and start the computer. It will Boot from the USB pen drive.
*. Now follow the instructions to install Tails OS.
Now you are free to browse Internet anonymously with Tails and it has some useful built in applications like Pidgin Instant Messanger, Tor, Browser and others and these applications are pre-configured to give you anonymity on the Internet.
Enjoy being anonymous on the Internet.
All of us using internet everyday and we can say that now we are unable to live using internet today. But can we imagine how it works ? Don't worry we will see now how the internet actually works.
Working of the Internet
*. The data you access on your PC is stored on the main computer that we call as Server and the data sent from the server to the client. The client is a computer from which request sent to the server for accessing data on it. Client can be laptop, PC or smartphone. These both are the end points that make a chain of the internet.
*. Every client/server use a network card to access the internet and a unique address called the IP address.
*. All the data sent to the internet is in the form of packets. When you click on any image on the webpage, the data that makes up that image is divided into smaller parts i.e. packets and then these packets sent over the internet and when every packet reach to its destination then they combine to form an image that you clicked.
*. Remembering IP address is a very worse thing to do, isn't it ? But to solve this problem domain name system included. It is basically a contact book that keep track of the IP addresses and their associated names. DNS is a domain name server that hosts a database of domain names that can be referred to.
For example: http://www.google.com can be written on the address bar as 74.125.239.96
What happen when you type a website address ?
*. If you type 'www.facebook.com' in the address bar.
*. Your computer translates that data into the request that is sent via your local Internet Service Provider (ISP), which will then connect to the DNS server for knowing the IP address of 'www.facebook.com'
*. The local ISP will have regional ISP above it. The regional ISP will in turn contact a Network Service Provider (NSP) that will contact a Network Access Point (NAP). All these are routers. Once the DNS tells the system the IP address that you are looking for, all these routers will try to find that IP address.
*. Once the addresses are resolved and the server located, your request is finally submitted and the server responds with data. The data is sent in the form of packets.
*. So then finally the packets arrive to the client. They are already with the information needed and you browser then automatically collects and combines the data and interpret it. These all things happens in a matter of millisecond.


