When you are burning files on CD/DVD and if some files not
burned properly on the disk you may cause the error like this. This error shows
near your system tray and you can’t able to remove that kind of
error.
This kind of error have to be fix by most of the Windows users
but unable to fix it after removing CD/DVD and completed burning files to
it.
What is the cause of this error ?
This error cause due to temporary storage of files into your
systems temporary storage folder. If you didn’t burn some of the files that
stored into that folder then this error continue to show near your system
tray.
How to fix the error ?
Fixing this error is not that much hard thing to do. You are now
able to fix this error by using simple Run commands or by just opening the
folder.
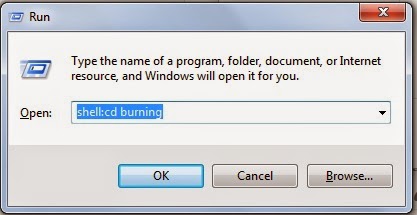
*. Open Run directly by pressing Win + R. Now type
shell:cd burning and press Enter.
*. You will prompt a Window in which temporarily files were
stored during burning process. You just need to delete that files and you are
done.
OR
*. Open the folder located at
C:\Users\<Username>\AppData\Local\Microsoft\Windows\Burn\Temporary
Burn Folder and delete all the files stored in that
folder.
Note: This folder is hidden by default and may not open
directly, so first check that you have checked show hidden files and folder
option from folder and search options.
You are now able to fix this issue easily and
not teased with this issue again.
There are lots of tools available for Windows that
are very useful in your day to day life. One of them is
Recordit. It is a very easy to use software for
Windows by which you can capture your screen in GIF file i.e. you can record
your screen activities in the form of GIF files and save them or upload them on
the web.
As GIF files don’t need more space they are easy
to share on the Internet and you can able to make videos of your screen
activities with this simple tool Recordit.
How to record your screen in GIF
You need Recordit software for making your GIF
videos of your computer screen. It is free software for Windows. You may direct
upload GIF files to the Recordit servers from where you can further use the file
on the web or download it for your own use. It is available in a free as well as
a paid version. We are discussing about the free version now.
With free version of Recordit you can record the computer screen
for upto 5 minutes which more than enough for any GIF file. You can download
Recordit from here.
*. After downloading and installing you will see a small camera
icon in your system tray. You just need to click on that and then select the
area for recording and click on Record
button.
*. Once you are done with the recording you can click on
Stop button to stop the recording or you can also
click on flashing icon for Stop from your system tray.
*. Now Recordit will automatically upload the video on the
server after which you will be notified by a small system tray icon. You can
click on it to view the video.
*. To download the created video you must click on the GIF
button on the bottom right corner of the video player and then right click on
the GIF file opened and then click on Save image
as.
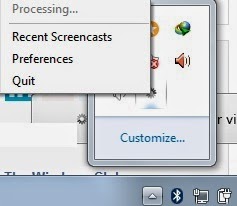
*. You can view previously created videos by clicking the
Recent Screencast menu from the system tray
icon.
Recordit is very easy to use software by
which you can create your free GIF screen videos which are very small in size.
So enjoy creating GIF videos of your computer.
The common issue of your system slow down might be occur many of
the time and you don’t have any clue how this occurring and what is the cause of
the problem. You have a Windows trick that may minimize your problem a little
bit and you could able to see how your system OS performing now and what is the
problem in your system.
You have a powerful tool in your Windows OS i.e. very well known
Command Prompt that will help you finding the problems in your system. Following
little info might help you sorting out some issues of your system.
How to find your PC’s Power Efficiency
Report
You don’t need any special tool for this, you can do this with
your Command Prompt i.e. cmd. You just have to open cmd in administrator
mode.
*. Open cmd in Administrator mode and
type powercfg –energy
*. Now your system’s power efficiency report will available to
you after 60 seconds and also you may check the information which will
automatically stored in a html file
at C:/Windows/system32/energy-report.html
That’s very much easy isn’t it! Enjoy
with this small trick…….!
Are you looking for the original installation date
of your Windows? You can find it easily but did you know how? Then follow this
post to know more.
Every Windows OS when installed on any system then
its information stored automatically in a system file during installation. This
system file saved during installation into Windows directory. You can get it
easily just follow simple steps as mentioned below.
How to check installation date of
Windows
You can check Windows installation date and other
information about your Windows operating system from using a command from
command prompt. Below steps will help you more.
*. Press Win + R and type cmd to open
Command Prompt.
*. Type systeminfo.exe and press
Enter.
*. Wait for few seconds and you will get all the information
about your Windows including Windows installation date and time.
You just found another useful information about
your Windows isn’t it! More such hidden features are included in your Windows
stay tuned for further updates.
Making portable applications is the necessity for
any computer user who works on different systems for the same work. Every time
when he/she wants to change the stored information in that application he/she
needs to copy all the files from one system to another. But, if you don’t want
to do like this every time then you may create portable apps by which you are
able to run the applications from any USB stick without installing the actual
application.
All the information stored in that
application will be also available and changes made in the portable application
also changed the information in the main application. So, you won’t need to
manually change the information every time. For doing this you need a software
program named Cameyo.
How to make portable apps in Windows?
Following steps will help you in creating portable
apps.
*. Download Cameyo from their official website here.
*. After installation you will proceed towards the Windows as
shown in the screenshot below.
*. Now you need to select Capture an
installation and then press OK.
*. Cameyo now start capturing initial screenshot of your system.
See below fig.
*. It will take some time to complete initial snapshot so keep
patience. Then you need to install application which you want to make portable
after seeing following window and then click on Install done after
installation.
*. Now it will take post installation screenshot and after
finishing you will be presented with following window.
*. Now your job is done you can find out the stored portable app
in
the following directory C:\Users\<your
username>\Documents\Cameyo apps
Enjoy creating portable apps with Cameyo and
keep visiting for updates.
You may not thought about this before reading this
post. If its right then this will surely help you to know about yet another
trick for your Windows.
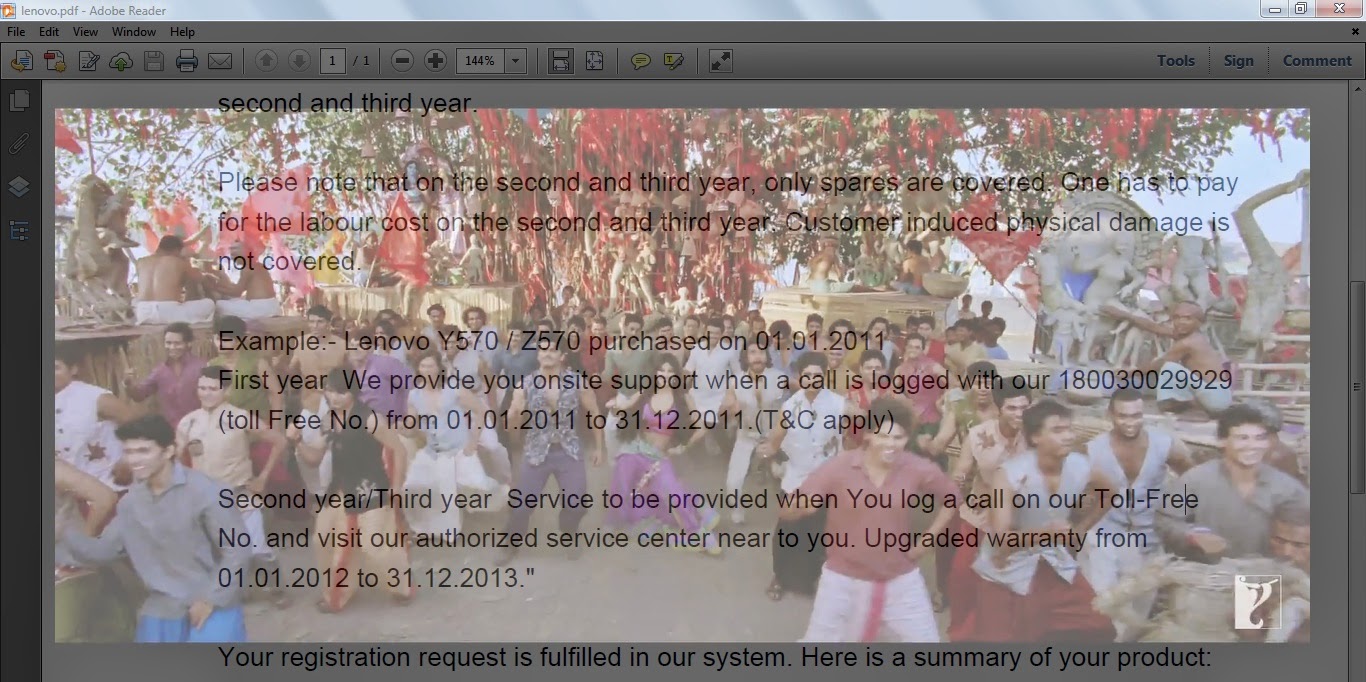
Making Windows transparent simply means you can
see through your active Window. Suppose you are working on MS Word then you may
also see your Desktop without closing it. It may help you whenever you want to
work on different Windows at a time. Just Imagine you are very excited to watch
a new movie from your computer and you have an important project which you have
to complete at the same time, then this post for you to solve the
issue.
How to make Transparent Windows ?
You need a small tool named
PeekThrough to do this. Follow the steps given below
to make it easy for you to make your Windows transparent.
*. First of all download PeekThrough
from here.
*. Click on the file install.exe and install it on your
system.
*. After installation you will see an icon in your system tray
as seen in the image below.
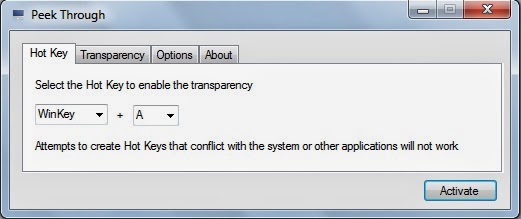
*. Now you just need to click on that icon and then click on
Activate to activate PeekThrough, after which you may
able to make your Windows Transparent with the shortcut Win +
A. You can also change the shortcut key.
*. To set transparency level just click on the
Transparency tab.
*. You have options under Option tab for start PeekThrough on
startup and also you can check an option Allow
click through of transparent window if
you want to click on other Windows other than your working Window after making
it transparent.
*. Now whenever you need to make any of the Windows transparent just
press Win + A and the same key can be used to make
Windows normal.
It’s easy… simple tricks can make your life easy. Keep following for further more
tricks.
Many of the times if you want to add images as a
background in windows explorer then you do this with the help of the small tool
named Windows 7 background changer. You can
change the background as you want with different images.
How to change folder background
Following simple steps will help you in changing
the background.
*. Download Windows 7 background changer from here.
*. For changing the background run the file
W7FBC.exe
*. Now click on Browse to select the
folder for which you want to change the background.
*. After selecting folder you need to add image for that just
click on Change Background Image and select the
image.
*. You can also change the text color of the folder name from
Text Color.
For removing the background follow the same procedure, just
select the folder location and click on the Remove Background
Image.
That’s it, it’s very easy isn’t it! Just
change background of folders and enjoy with the posts.
You may have different drives on your computer.
But do you know you can access any folders as a drive ? Yes it is possible. You
can create virtual drives and able to access them from My Computer without any
partition process.
How to access folder as a drive
For creating your own drives of folders. You need to follow some
simple steps as follows
*. Open Command Prompt from start menu or directly by pressing
Win+R and typing cmd.
*. Type subst F: D:\Files\folder and
hit Enter.
*. You can replace F: with your desired
drive letter.
*. You can replace D:\Files\folder
with the path of the folder for which you want to create drive.
Now you can see on My Computer that another drive with drive
letter H: is created. But it is temporary because when you restart your system
then this drive will be disappeared.
If you want to create a permanent drive without partition for
particular folder then you can do this by following process.
*. Open Notepad and type the code
@echo off
subst F:
D:\Files\folder
exit
*. Save this file with .bat extension and paste it to the
Startup folder of your system which is located at
C:\ProgramData\Microsoft\Windows\Start
Menu\Programs\Startup.
It is actually hidden by default you may change your system
settings to Show the hidden files and folders from folder and
search option in the view tab.
Now, just Restart your computer and you
are done. Enjoy with this tutorial.
Have you ever needs to Shut Down your computer automatically after some specified time. Are you slept by keeping your computer ON and forgot to Shut it down. Then this post will certainly help you. You can now sleep or go to another place without worrying about your PC and it will shut down automatically after some specified time.
How to shut down Windows 7,8 or 8.1
In the case of Windows operating system there is no predefined key to Shut Down your computer after specified amount of time. For this this simple tutorial will certainly help you. Follow the steps given below....
*. Firstly Right click on Desktop go to New and select Shortcut.
*. In the text box saying Type the location of the item type shutdown.exe -s -t 1800 and click Next.(Here 1800 denotes the time in seconds after which your system will be Shut Down)
*. Now in the Next field type the name of the Shortcut and you are done.
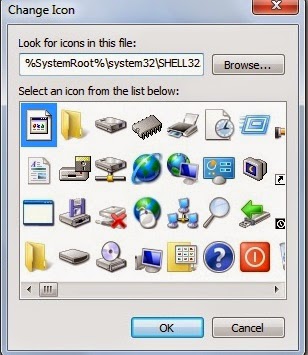
*. You can also change the icon of the Shortcut. For this go to properties of the Shortcut and click on Change Icon and select the icon that you want to set.
 *. Double click on the created icon to start the process of Shut Down. It will be shut down after the time that you set.
It is also possible to restart your system follow the same procedure and change the value to shutdown.exe -r -t 00
Same procedure can be applied to Hibernate or Sleep. For that the value is rundll32.exe powrprof.dll,SetSuspendState 0,1,0
To Lock your system the value is rundll32.exe user32.dll,LockWorkStation
Isn't it very simple.....That's it enjoy this tutorial and share with friends.
Did you ever need to copy text from any type of images? If you didn't able to do that then this post should be helpful for you. Yo will able to copy text from images without any need to download third party software.
There are certain tools available on the Internet that you can use but these tools are not that much accurate for copying text from images. So this guide will help you.
How to copy text from images
You know about a built in Windows softwares which comes under the Microsoft Office software tools i.e Microsoft Office OneNote. Actually it is a new software from Windows and it is pre-installed in Windows Vista or Windows 7, 8.
*. Open Microsoft Office OneNote from Start menu.
*. Copy the image from which you want to copy text and paste it into Microsoft Office OneNote.
*. Now, Right click on the image and select Copy Text from Picture.
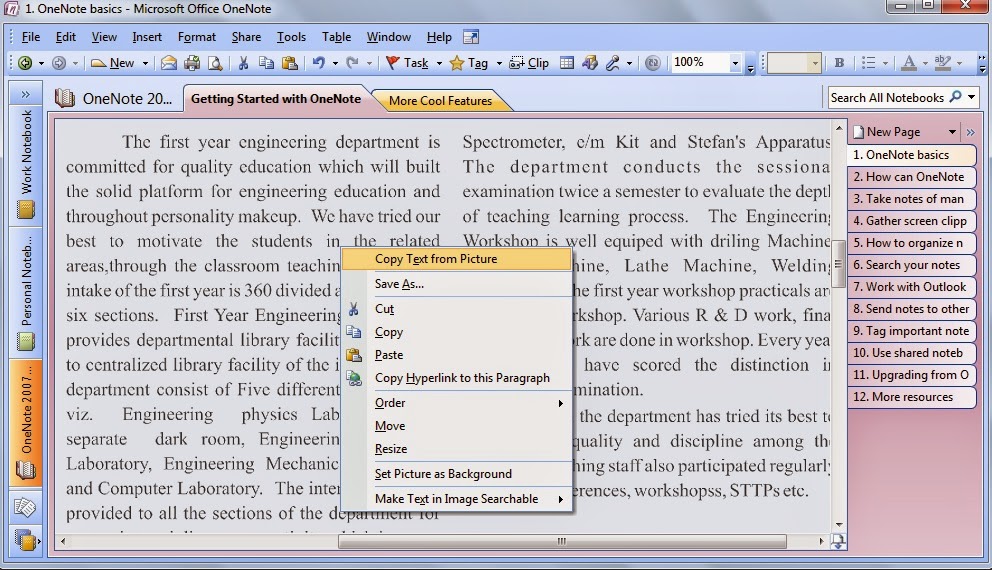 *. Finally paste the copied text into any text editor like Notepad.
You done it! Isn't it very easy. You can also search text from images when you copy the image into OneNote.
You will able to know from this post about how you can increase your RAM in Windows 7. Basically we need RAM to improve performance of our computer and we can do any work on our computer efficiently. Gaming or running any heavy graphic application consume more amount of RAM, so we will learn to increase it.
Following steps will improve your PC's performance
*. Right click on Computer or My Computer and select properties.
*. Now click on Advanced system settings and in the Advanced tab click on Settings.
*. Now go to Advanced tab and click on Change.
 *. Uncheck the option Automatically manage paging file size for all drives.
*. Then select the drive (Recommended C: drive or any System managed drive).
*. Now select Custom size and enter the Initial size in MB like Recommended size. For ex. 4479 MB.
*. Enter Maximum size in MB like Recommended size. For ex. 4479 MB.
That's it click on OK and restart your system you can feel the improvement in your system.

