Showing posts with label Windows. Show all posts

Friday 12 June 2015

how to enable Windows administrator account

Windows provide separate accounts for different users of the OS. There is one administrator user account who has all the privileges to access all the features of Windows but this default account provided during installation has limited access operations. Even though you have been using the account with administrative privileges, the tasks that have been performed may ask for a UAC confirmation. The elevated administrator account has been disabled in the windows 7,windows 8,windows 8.1 and windows vista.

Following are some simple methods to access administrator account of Windows:

*. If you are using Windows 7, 8 or 8.1 then you need to open command prompt (cmd) in administrator mode.

*. Then enter following commands on the command prompt
                                                 net user administrator /active:yes

After that,you would see a message that your command was successful. This will activate administrator account and you can access it after logging off the system.

administrator account activeted successfully

*. To disable the built in administrator account execute following commands on the command prompt
                                                   net user administrator /active:no

*. After this the administrator account will mo longer appear on the login screen.

This simple tutorial will definitely help you overcoming the problem of administrator privileges.

Friday 5 June 2015

All about "Get Windows 10" app its problems and solutions

Everyone should aware of the Windows 10 upgrade which will be rolled out from 29 July 2015 throughout the world. It is a free upgrade for the users who own legal license to either Windows 7,8 or 8.1. Microsoft announced that all the upgrades to the present Windows users will be rolled out by a Get Windows 10 app which is similar to Windows upgrade assistant and you don't need to download is manually instead it will be automatically downloaded with the Windows updates.

get Windows 10 app reserve upgrade

How to install and use Windows 10 app?

*. As far as getting the Get Windows 10 app (GWA) you need to update your Windows with the optional update KB3035583.

get windows 10 app icon

*. With this update the app is automatically downloaded on your computer. This puts a small Windows logo near your system tray on task bar. You can click on that icon to check your system's compatibility for Windows 10 and after the launch of Windows 10 you can upgrade your Windows with Windows 10. You will need a good internet connectivity because it will approximately 3GB.

*. After this you will see a small Windows icon on your task bar near system tray. This can be used to start the app and you can check your system's compatibility with the app and also use it for later Windows upgrade when it will launch officially.

*. You can also reserve your Windows 10 upgrade for getting the notification when it is launched.

Problems and solutions for installing the Get Windows 10 app

*. If you don't see the icon of the app you need to check whether the update KB3035583 is downloaded and installed on your computer.

*. Check this from Windows update history. If you don't see the update you need to check for updates for the update to download and install.

*. Another way to check this update is from Command Prompt (cmd). Open cmd and type

                                        dism /online /get-packages | findstr 3035583

You will see output like this:

                         Package Identity : 
                        Package_for_KB3035583~31bf3856ad364e35~amd64~~6.3.1.29

If you still not getting the App icon on the taskbar then follow the following steps

*. Open Notepad and copy and paste the following script

REG QUERY "HKLM\SOFTWARE\Microsoft\Windows NT\CurrentVersion\AppCompatFlags\UpgradeExperienceIndicators" /v UpgEx | findstr UpgEx
if "%errorlevel%" == "0" GOTO RunGWX
reg add "HKLM\SOFTWARE\Microsoft\Windows NT\CurrentVersion\AppCompatFlags\Appraiser" /v UtcOnetimeSend /t REG_DWORD /d 1 /f
schtasks /run /TN "\Microsoft\Windows\Application Experience\Microsoft Compatibility Appraiser"
:CompatCheckRunning
schtasks /query /TN "\Microsoft\Windows\Application Experience\Microsoft Compatibility Appraiser"
schtasks /query /TN "\Microsoft\Windows\Application Experience\Microsoft Compatibility Appraiser" | findstr Ready
if NOT "%errorlevel%" == "0" ping localhost >nul &goto :CompatCheckRunning
:RunGWX
schtasks /run /TN "\Microsoft\Windows\Setup\gwx\refreshgwxconfig" 


*. Save this script as ReserveWin10.cmd in any directory like C drive.

*. Run the saved file as administrator and wait for the operation to complete. It may take 10 to 15 minutes to complete so be patient.

I hope you enjoyed this article and also hopeful that you will sort out the issues with windows 10 app. If you have any queries you can comment it below.

Thursday 15 January 2015

Top 5 best antivirus software Review 2015

There are lots of software manufacturers are in the business of Antivirus and Internet security tools. All of them claim that their product is best among all the competitors in the market. How well they perform in a real world? Which is the best? Who provides best Internet security? There are lot more questions arises before choosing an Antivirus solution. Here we will look among some best security suites too minimize the confusion.

best antivirus software and internet security

1. Bitdefender Total Security 2015


bitdefender 2015 best antivirus software

One of my favorites Antivirus and Internet security software Bitdefender Total Security 2015 is a total package. It has some premium features includes file encryption, device antitheft and secure online storage.

*. Bitdefender Total Security 2015 engages security with a single click.
*. Bitdefender’s OneClick Autopilot automatically makes the best security decisions for you.

*. Bitdefender Total Security 2015 automatically detects when you Work, Play or Watch movies, and prevents other apps from slowing you down.

*. OneClick Optimizer speeds up your system and frees up disk space.

*. Bitdefender Wallet simplifies purchases by securely autofilling your credit card details.

*. A two-way firewall, parental controls and cloud antispam are another few features.
In my words it is one of the best security provider and you should try for it.

2. Norton Internet Security 2015


Symantec's Norton one of the best antivirus software

The user interface is much easier to use and navigate than the previous versions of Norton. This year Norton done a good job and you can get one for you if you are fan of Norton products.


*. In real-time antivirus tests Norton scoring near the top and blocked nearly all known viruses.

*. Norton uses less memory, it uses less than 1% CPU and only about 7MB of memory and during full system scan CPU usage at about 55%-90% and 50MB of RAM which is average usage.

*. There are five basic sections for each function of the software. Each is clearly labelled with big icons.

*. Overall, it's a clean, modern and easy to use simple interface. 

3. Kaspersky Internet Security 2015


kaspersky internet security

In the recent years Kaspersky has grown to become a global leader in PC security. It has very good virus and malware protection.

*. Kaspersky is extremely good at identifying, blocking, and removing virus and other threats. Kaspersky's heuristic protection and false positive detection also nearly perfect which detect previously unknown viruses.

*. It has very good overall malware protection


*. Kaspersky uses 130MB of RAM while in idle state and goes to 550MB when full system scan which we think is too much compared to others.

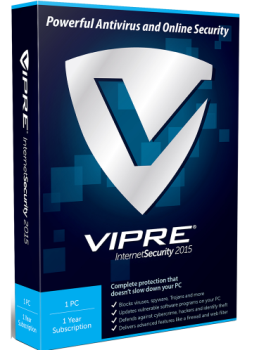
4. Vipre Internet Security 2015

vipre antivirus

With several added security features and the same antivirus protection of VIPRE Antivirus, VIPRE Internet Security earns our "Editors' Choice Award" again this year, even though the software isn't perfect.

*. The antivirus engine has excellent real-time protection and is effective at removing viruses. Its malicious website filter prevents you from accidentally visiting a known harmful website.


*. Firewall protection is great and it scores 10 out of 10 in our tests.

*. There are some extra features for added security like its Facebook scanner and its history cleaner.

*. User interface is not that much good enough it has to be improved.

*. Even though the user interface isn't that much better it does it's job better than any of the other Internet Security software. And if ever get infected, ThreatTrack Security (VIPRE's makers) will help you remove it for free.


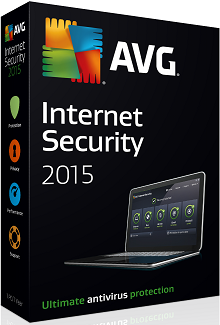
5. AVG Internet Security 2015

avg internet security 2015

AVG is all known to us for their free Antivirus solution. But basic Antivirus doesn't ensures fully protected PC. For 2015 AVG has significantly improved their Internet Security suite this year with an improved firewall, and better overall protection.

*. The user interface is much more modern and easy to use.


*. Malware detection is very good with AVG which was an issue before this.

*. AVG is not bad in real time protection also and it performed well in this category.

*. It consumes low memory space.

*. It is one of the better all around Internet Security suites.

This is our review among the top Antivirus and Internet security products hopefully you enjoyed it.

Thursday 8 January 2015

How to remove write protection from USB flash drives

Security from viruses is among the greatest priorities for any Windows user. USB flash drives such as pendrives are most likely to catch viruses from any devices and may harm your files. There are some recovery techniques available after corruption of data due to virus or say malware attack but still you notice that every now and then pendrives catch viruses.

usb flash drives write protected gdrive

For the security purpose many people use write protection on their USB flash drives, pendrives so that it may not affect by the malware attack. But if you want to remove write protection on the pendrive or any other external USB flash drive for copying any important file you can do this using this simple registry tweaking trick.

How to remove write protection from USB flash drives

Method 1: Using Registry 

Follow the steps and you can write data to your pen drive.

*. Open notepad or any text editor and copy & paste the following:

[HKEY_LOCAL_MACHINESYSTEMCurrentControlSetControlStorageDevicePolicies] “WriteProtect”=dword:00000000

*. Now save the file with .reg extension.

registry file

*. Now double click on the file you have saved and in the pop up window choose Yes and you will see the message as in the screenshot below. That's it just press OK and you're done, now you can write any type of data on the pen drive.

registry key applied successfully

To Turn ON the write protection you may follow the same procedure as above but paste the following code instead of above

[HKEY_LOCAL_MACHINESYSTEMCurrentControlSetControlStorageDevicePolicies] “WriteProtect”=dword:00000001

Method 2: Using Diskpart

*. Open command prompt as an administrator and type diskpart.

*. Then type list disk and press enter to see the list of drives.

*. Select the USB drive by typing  select disk 1 (if disk 1 is your USB drive otherwise choose the number which assigned to your  USB drive)

*. At last type attributes disk clear readonly and press enter. Finally type exit  to quit diskpart and you're done with the process.

cmd diskpart commands to remove read only

That's it you have no write protection on the usb drive now. Enjoy the trick and keep your system safe from viruses.

Sunday 28 September 2014

Recovering data from Scratched or damaged CD/DVD’s

You have noticed that many of the time your CD/DVD’s scratched due to not using them for a longer period of time. All of us mostly depend on cloud data storage and USB drives or hard drives due to their portability and last longer ability. CD/DVD’s mostly have the data that is very old but due to the importance of the data we have to keep them in good place, but they damaged in any case and data recovery is the most complicated problem for ourselves from them.


DVD

For this problem we have found solution. This might help you recovering data from your CD/DVD’s in easier way. Here we are suggesting two easy to use programs which can be used to recover data from damaged CD/DVD’s.


Roadkil’s Unstoppable Copier is a simple, small and easy to use program which is mainly designed to recover data from scratched or damaged CD/DVD’s.


dvd copier roadkils unstoppable

Every time when you tried to copy any files from scratched CD/DVD’s you may encounter numerous errors such as “Not readable” or “Corrupted”. This is the reason why Roadkil’s Unstoppable Copier here to help you. It is a free program which you can download from here.


Another program is CD Recovery Toolbox which also support for the new format Blu Ray disc’s. This utility is capable of recovering data from both scratched, damaged or corrupted optical discs. You can download it from here.


recovery toolbox cd copy

New and modern gadgets overcome the use of CD/DVD’s but still they’re used for storing important backups. So, hopefully if you have facing problems of recovering data from damaged CD/DVD’s then this post will help you….

Tuesday 16 September 2014

How to zoom into Videos with VLC

Zooming into images is a normal work that you do everyday, anywhere, on your PC or your mobile but do you know you can also zoom into video files. Definitely you’ve noticed that you need to zoom into video files while watching high quality movies or just while watching any video for make yourself able to view smaller parts of the videos behind it.

This difficulty can be overcome. Yes, and it’s simple too. You know how to do it? Well you don’t have to be a scientist for this, you can do it by using your VLC media player, isn’t it cool to have such a feature.

Steps to make a zoom into videos

Steps are very easy to follow, just follow below steps to do your work.

*. Open any video file with VLC media player.

*. Now press Ctrl+E to open Adjustment and Effects window or click on Tools from menu and select Effects and Filters.

*. Click on Video Effects tab and then click on Geometry tab.

 interractive zoom vlc

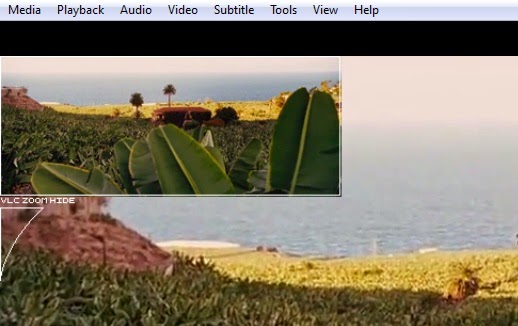
*. Now just mark the checkbox near Interactive Zoom and you’re done.

*. You will see a zooming option available on your VLC at left upper corner, using that option you can easily make a zoom in your videos like you increase the volume.             

                             VLC zoom video
Isn’t it so much easier? definitely it is...!. Enjoy zooming videos and keep connected with us for more such valuable tricks.

Sunday 7 September 2014

Troubleshooting Guide to Windows 7,8 or 8.1 installation

Did you experience some problems during Windows installation? If yes then this guide may help you better understand Windows installation.

Microsoft build Windows installation procedure with easy to use user interface that is very easy to use for any normal user. But sometimes due to some reasons it may cause some errors or troubles that makes installation of Windows somewhat complicated. Every normal computer user experience such type of problems and not able to solve them easily but here you will able to solve your problem.

If you have installed any other operating system on your system or want to dual boot Windows with Ubuntu or other OS then you have to face some problems related to partition. Before we begin you should know about the commonly used partitioning methods that are used by different systems or OS.

There are two types of partitioning methods that are used by different operating systems. First one is MBR and another is GPT. Now modern Windows operating system uses GPT partition only and some old Windows version and Linux distribution operating systems use MBR partition scheme.

What is MBR and GPT?

MBR that stands for Master Boot Record is the old standard for managing the partition in the hard disk. The MBR resides at the very beginning of the hard disk and it holds the information on how the logical partitions are organized in the storage device. MBR uses 32-bit to record the partition, each partition can only go up to a maximum of 2TB in size. MBR is the only place that holds the partition information. If it ever get corrupted , the entire hard disk is unreadable.

GUID Partition Table (GPT) is the latest standard for the partitions of a hard disk. Unlike MBR that limits each partition to only 2TB in size, each partition in GPT can hold up to 2^64 blocks in length because it uses 64-bit. In Microsoft Windows, that size is limited to 256TB.

Steps to install and handle trouble?

Now you are somehow familiar with basic partitioning schemes. So now let us start the procedure of Windows 8 installation.

*. Make a bootable DVD or USB pendrive with Windows 8, 8.1 setup and restart your PC to make your system boot from external device i.e. DVD/USB pendrive.

*. After booting you have to normally choose the language, timezone and keyboard layout.

Wnidows 8 installation step 1

*. Then click on install now and accept terms and conditions as you usually do.

Windows 8 installation step 2

Windows 8 installation step 3

*. Now you will be presented with partitioning wizard. If you have a valid GPT partition scheme then you can directly choose next and follow the instruction but if you are facing problems with partitioning scheme like as following screenshot then follow the next step.
Windows 8 installation step 4

*. Press Shift+F10 and a Command Prompt window will appear.
Enter the following commands one by one:

   
DISKPART
LIST DISK
SELECT DISK #

(# is the number you saw in the previous step.)

CLEAN
CONVERT GPT/MBR
(You may use GPT or MBR it depends on your partition type if it is of GPT then yoy have to use MBR and if it is MBR then GPT)
CREATE PARTITION PRIMARY SIZE=50000

(The size is in MB, so enter the amount that you want to use for your main system partition. i.e. C:\ drive)

FORMAT FS NTFS LABEL "SYSTEM" QUICK

Windows Diskpart cmd
*. After this click on refresh and then select the partition you just created and click on Next.

That’s it…! Now follow the wizard for installation and your Windows 7,8 or 8.1 OS will be installed without any trouble.

Thursday 4 September 2014

How to change Startup sound of Windows

Are you a long time Windows user? Surely you are not new to the Windows OS. Most of the computer users make you of Windows OS.

Some or all the users were annoyed with Windows Startup sound. Windows doesn’t provide default setting to change the Startup sound. But you can change your Windows system’s Startup sound with some methods. First method you can use to change startup sound of Windows is by hacking or you may say tweaking registry setting but it is very complicated for a normal user.

There is another method to change the startup sound with the help of a free program named Startup sound changer. This is very is to use program and you can easily change your system’s startup sound.

How to change Startup sound?

*. Download Startup sound changer from here.

*. Run the downloaded file with administrator privileges. You will be presented by the following interface.

startup sound changer
 *. Now click on Replace and select the .wav audio file that you want to set as the default startup sound for Windows.

*. Finally click on play to hear the changed sound.

Note: The file size should be less than 1 MB and the file format should be .wav.


That’s it! The startup sound for Windows would be changed. Restart your computer and you would be able to hear the new startup sound set by you. In case you want to revert back to the default startup sound, simply click on Restore.

Monday 1 September 2014

How to hide Drives from Windows Explorer

Sometimes you have a private data that you needs to be hidden so you use hidden feature of Windows to hide some private files. But if you need to hide entire drive then you may face some difficulties. You are very well aware of hiding files in Windows but, did you know you may also hide your drives from appearing in the Windows Explorer.
Hide drives

For protecting your privacy in this post you will able to know about hiding drives in Windows.

How to hide drives ?

There are certain tricks by which you can hide drives from Windows explorer but from these tricks you will have to edit windows registry. For any advanced Windows user this is an easy task but for a normal user it is somewhat tough.

Fortunately a tool that doesn’t needs to tweak registry is available for you. This tool is NoDrives manager which is a free and simple to use and and can help you hiding your logical drives in Windows Explorer. But note that if you type the name of the drive in the Windows Explorer then it will be shown to you, so keep your drive name private for make it inaccessible to others.

Following steps will help you more.

*. Download and install NoDrive manager from here.

*. Run NoDrive manager and select the drive you want to hide and click on Save changes to hide the drive.

NoDrives manager run

*. Now you will be prompted with a dialog box instructing you to restart your PC or log off and log in it again for the changes to take effect.
drives hidden successfully

*. Now just restart or log off your system and your drives will be hidden.

*. To recover hidden drives uncheck the checked hidden drives and click on save changes and restart or log off your system.

Along with the drives on windows, the tool can also be used to hide CD / DVD drives. You can also assign a password protection to NoDrives Manager application for your security after assigning password nobody can access the application or hide or unhide drives without your permission.

That's it from the easy tutorial for hiding drives from your Windows explorer to protect your private data from others. Hopefully you should enjoy doing it.

Friday 8 August 2014

Universal Viewer: Open different format files with single program

Different format of files needs to be open by a particular program, for example if you are playing any mp3 format audio then by default it open in Windows Media Player and a pdf document needs to be open by Adobe Reader. But think about a situation where you have to open certain file with some kind of file format and you don’t have the software to open that file so, what you will do? Obviously you will search for that software on the internet or take it from your friend or relative. But that is a very time consuming process, isn’t it! But the solution for this is Universal Viewer.

What is Universal Viewer ?

Universal Viewer is a software which may help you in such situations where you need to open specific file instantly and you won't have the software to open it. It is just one program that you will need to open different kinds of files with ease. You can open different file format files with this software if you don’t have the program to open the file. Universal Viewer supports different file formats such as .doc, .pdf, .mp3, .avi, .mkv, .xls, .ppt, .flv and lots more.

How to use it ?

It is very easy to use software program. You can download it from here and the follow the normal installation procedure to install the program and you are ready to go.

Universal Viewer open file
Whenever you need to open any file you can open Universal Viewer and open the file from file menu.

OR

Right click on any file that you want to open and select Universal Viewer and your file will be opened.

Right click Universal Viewer
That's it! it's nice to have a program like this isn't it? It minimizes the work of downloading extra softwares.

Wednesday 6 August 2014

Lock your Computer with USB using Password Booster Screen Lock

Using Win + L to lock your computer is boring nowadays because every time you need to unlock your computer you need to enter password. It is frustrating sometimes. So its a cool idea to make your system unlock without entering password, just you need to do is plug your USB drive and your Computer get unlock, isn’t it cool…!


What is Password Booster Screen Lock ?

Password Booster Screen Lock is a small software program that lets you lock/unlock your computer using USB drive. You don’t need to enter password every time you want to unlock your computer. It minimizes your work of typing a password every time when you are waking up your system from sleep or lock mode.

How to use Password Booster Screen Lock ?

It is very easy to use software program and anyone can handle it with ease. It gets automatically enabled when you install it in your computer. After installation you can see a green icon in your system tray. Download it from here.

*. After installation click on the green icon to see the window for your USB drive setup.

password booster icon
*. Now click on Setup and then select Enroll a flash drive then connect your USB flash drive. It will automatically detect the flash dive and configure it for locking/unlocking purpose.

setup usb
*. Now whenever you remove your USB flash drive your computer gets automatically locked and connecting it will automatically unlock your computer.

You can enable or disable it by simply right clicking on the icon from the system tray. That’s it! you are free from the boring password unlock.

Sunday 3 August 2014

Hide or Blur your Windows

You are in the situation where you may need to hide your personal work from others like friends or family or just need to hide from anyone. But you are not able to do this normally, but don’t worry you are now do this and you may not need to take your computer to sleep every time.

One software tool is in a help for you for this. Name of the software tool is AntiSnooper. AntiSnooper is available for everyone to use. You have an option to purchase it or you can use it freely. This is very simple to use software that anyone can use easily.

How to use AntiSnooper ?

AntiSnooper is very easy to use you can download it from their official website here.

*. After installation you will be presented with the Window as shown in the screenshot below.

antisnooper

*. All the active programs will be shown in that Window. You can see the currently active window there, when you are working on it.

*. Now click on the green plus icon and your program will be protected with AntiSnooper.

*. When you remove your cursor from that program you can see that its window becomes blurred.

blurred facebook window

*. For removing protection again click on that icon and your protection will be removed.

You are now protected with AntiSnooper. It’s very cool to use and protect your privacy. Use it and share with friends.

Thursday 31 July 2014

How to Remove files waiting to be Burned to Disk Error

When you are burning files on CD/DVD and if some files not burned properly on the disk you may cause the error like this. This error shows near your system tray and you can’t able to remove that kind of error.

This kind of error have to be fix by most of the Windows users but unable to fix it after removing CD/DVD and completed burning files to it.

What is the cause of this error ?

This error cause due to temporary storage of files into your systems temporary storage folder. If you didn’t burn some of the files that stored into that folder then this error continue to show near your system tray.


burn files

How to fix the error ?

Fixing this error is not that much hard thing to do. You are now able to fix this error by using simple Run commands or by just opening the folder.

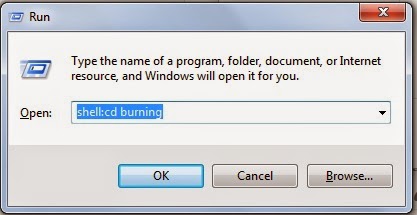
*. Open Run directly by pressing Win + R. Now type shell:cd burning and press Enter.


shell burning

*. You will prompt a Window in which temporarily files were stored during burning process. You just need to delete that files and you are done.
OR

*. Open the folder located at C:\Users\<Username>\AppData\Local\Microsoft\Windows\Burn\Temporary Burn Folder and delete all the files stored in that folder.

Note: This folder is hidden by default and may not open directly, so first check that you have checked show hidden files and folder option from folder and search options.


You are now able to fix this issue easily and not teased with this issue again.

Monday 28 July 2014

GIF Screen Recording using Recordit

There are lots of tools available for Windows that are very useful in your day to day life. One of them is Recordit. It is a very easy to use software for Windows by which you can capture your screen in GIF file i.e. you can record your screen activities in the form of GIF files and save them or upload them on the web.

As GIF files don’t need more space they are easy to share on the Internet and you can able to make videos of your screen activities with this simple tool Recordit.

How to record your screen in GIF

You need Recordit software for making your GIF videos of your computer screen. It is free software for Windows. You may direct upload GIF files to the Recordit servers from where you can further use the file on the web or download it for your own use. It is available in a free as well as a paid version. We are discussing about the free version now.

With free version of Recordit you can record the computer screen for upto 5 minutes which more than enough for any GIF file. You can download Recordit from here.

*. After downloading and installing you will see a small camera icon in your system tray. You just need to click on that and then select the area for recording and click on Record button.

camera icon

*. Once you are done with the recording you can click on Stop button to stop the recording or you can also click on flashing icon for Stop from your system tray.

stop icon

*. Now Recordit will automatically upload the video on the server after which you will be notified by a small system tray icon. You can click on it to view the video.

uploading video

*. To download the created video you must click on the GIF button on the bottom right corner of the video player and then right click on the GIF file opened and then click on Save image as.

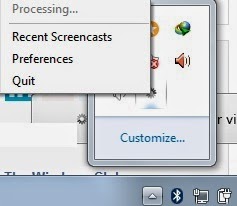
*. You can view previously created videos by clicking the Recent Screencast menu from the system tray icon.

screencast icon


Recordit is very easy to use software by which you can create your free GIF screen videos which are very small in size. So enjoy creating GIF videos of your computer.

Friday 25 July 2014

View your computer’s power Efficiency Report

The common issue of your system slow down might be occur many of the time and you don’t have any clue how this occurring and what is the cause of the problem. You have a Windows trick that may minimize your problem a little bit and you could able to see how your system OS performing now and what is the problem in your system.


You have a powerful tool in your Windows OS i.e. very well known Command Prompt that will help you finding the problems in your system. Following little info might help you sorting out some issues of your system.

How to find your PC’s Power Efficiency Report

You don’t need any special tool for this, you can do this with your Command Prompt i.e. cmd. You just have to open cmd in administrator mode.

*. Open cmd in Administrator mode and type powercfg –energy


power efficiency

*. Now your system’s power efficiency report will available to you after 60 seconds and also you may check the information which will automatically stored in a html file at C:/Windows/system32/energy-report.html


energy report

That’s very much easy isn’t it! Enjoy with this small trick…….!

Wednesday 23 July 2014

How to check Original Installation date of Windows

Windows installation date

Are you looking for the original installation date of your Windows? You can find it easily but did you know how? Then follow this post to know more.

Every Windows OS when installed on any system then its information stored automatically in a system file during installation. This system file saved during installation into Windows directory. You can get it easily just follow simple steps as mentioned below.

How to check installation date of Windows

You can check Windows installation date and other information about your Windows operating system from using a command from command prompt. Below steps will help you more.

*. Press Win + R and type cmd to open Command Prompt.

*. Type systeminfo.exe and press Enter.

*. Wait for few seconds and you will get all the information about your Windows including Windows installation date and time.


You just found another useful information about your Windows isn’t it! More such hidden features are included in your Windows stay tuned for further updates.

Friday 18 July 2014

How to make portable apps with Cameyo

Making portable applications is the necessity for any computer user who works on different systems for the same work. Every time when he/she wants to change the stored information in that application he/she needs to copy all the files from one system to another. But, if you don’t want to do like this every time then you may create portable apps by which you are able to run the applications from any USB stick without installing the actual application.
Cameyo official

All the information stored in that application will be also available and changes made in the portable application also changed the information in the main application. So, you won’t need to manually change the information every time. For doing this you need a software program named Cameyo.

How to make portable apps in Windows?

Following steps will help you in creating portable apps.

*. Download Cameyo from their official website here.

*. After installation you will proceed towards the Windows as shown in the screenshot below.

start cameyo

*. Now you need to select Capture an installation and then press OK.

*. Cameyo now start capturing initial screenshot of your system. See below fig.

Initial screenshot

*. It will take some time to complete initial snapshot so keep patience. Then you need to install application which you want to make portable after seeing following window and then click on Install done after installation.

install done

*. Now it will take post installation screenshot and after finishing you will be presented with following window.

Package created

*. Now your job is done you can find out the stored portable app in 
the following directory C:\Users\<your username>\Documents\Cameyo apps


Enjoy creating portable apps with Cameyo and keep visiting for updates.

Popular Posts