Many of the times if you want to add images as a
background in windows explorer then you do this with the help of the small tool
named Windows 7 background changer. You can
change the background as you want with different images.
How to change folder background
Following simple steps will help you in changing
the background.
*. Download Windows 7 background changer from here.
*. For changing the background run the file
W7FBC.exe
*. Now click on Browse to select the
folder for which you want to change the background.
*. After selecting folder you need to add image for that just
click on Change Background Image and select the
image.
*. You can also change the text color of the folder name from
Text Color.
For removing the background follow the same procedure, just
select the folder location and click on the Remove Background
Image.
That’s it, it’s very easy isn’t it! Just
change background of folders and enjoy with the posts.
You may have different drives on your computer.
But do you know you can access any folders as a drive ? Yes it is possible. You
can create virtual drives and able to access them from My Computer without any
partition process.
How to access folder as a drive
For creating your own drives of folders. You need to follow some
simple steps as follows
*. Open Command Prompt from start menu or directly by pressing
Win+R and typing cmd.
*. Type subst F: D:\Files\folder and
hit Enter.
*. You can replace F: with your desired
drive letter.
*. You can replace D:\Files\folder
with the path of the folder for which you want to create drive.
Now you can see on My Computer that another drive with drive
letter H: is created. But it is temporary because when you restart your system
then this drive will be disappeared.
If you want to create a permanent drive without partition for
particular folder then you can do this by following process.
*. Open Notepad and type the code
@echo off
subst F:
D:\Files\folder
exit
*. Save this file with .bat extension and paste it to the
Startup folder of your system which is located at
C:\ProgramData\Microsoft\Windows\Start
Menu\Programs\Startup.
It is actually hidden by default you may change your system
settings to Show the hidden files and folders from folder and
search option in the view tab.
Now, just Restart your computer and you
are done. Enjoy with this tutorial.
Have you ever needs to Shut Down your computer automatically after some specified time. Are you slept by keeping your computer ON and forgot to Shut it down. Then this post will certainly help you. You can now sleep or go to another place without worrying about your PC and it will shut down automatically after some specified time.
How to shut down Windows 7,8 or 8.1
In the case of Windows operating system there is no predefined key to Shut Down your computer after specified amount of time. For this this simple tutorial will certainly help you. Follow the steps given below....
*. Firstly Right click on Desktop go to New and select Shortcut.
*. In the text box saying Type the location of the item type shutdown.exe -s -t 1800 and click Next.(Here 1800 denotes the time in seconds after which your system will be Shut Down)
*. Now in the Next field type the name of the Shortcut and you are done.
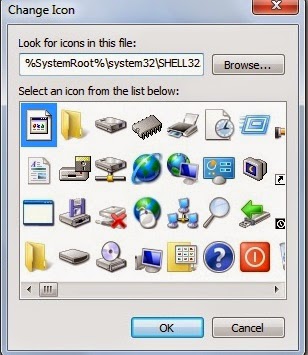
*. You can also change the icon of the Shortcut. For this go to properties of the Shortcut and click on Change Icon and select the icon that you want to set.
 *. Double click on the created icon to start the process of Shut Down. It will be shut down after the time that you set.
It is also possible to restart your system follow the same procedure and change the value to shutdown.exe -r -t 00
Same procedure can be applied to Hibernate or Sleep. For that the value is rundll32.exe powrprof.dll,SetSuspendState 0,1,0
To Lock your system the value is rundll32.exe user32.dll,LockWorkStation
Isn't it very simple.....That's it enjoy this tutorial and share with friends.


